The new design improves the older one in a few key aspects:
– Entirely 3D printed – Readily available, made in the USA variable capacitor – Easyto assemble
Basic geometry and main electrical characteristics remain unchanged: – 4o to 10 meters – 125 inches radiator – 165pF variable capacitor (dual gang series) – QRP power (it actually can handle a lot more but, as you know, using a magnetic loop in close proximity with more than a few Watt is against FCC guidelines and potentially dangerous. Don’t do that)
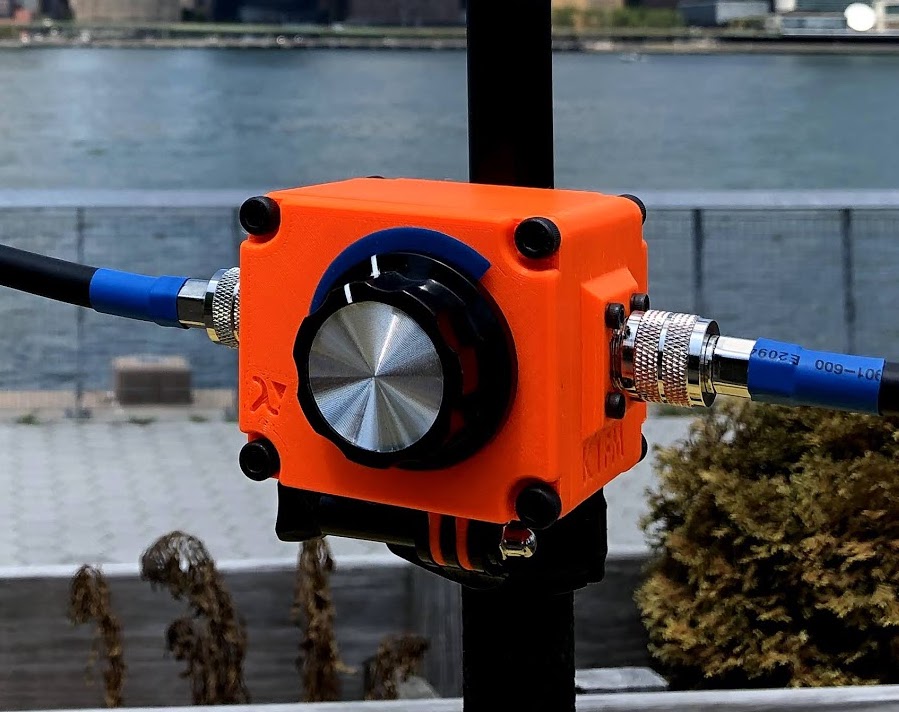
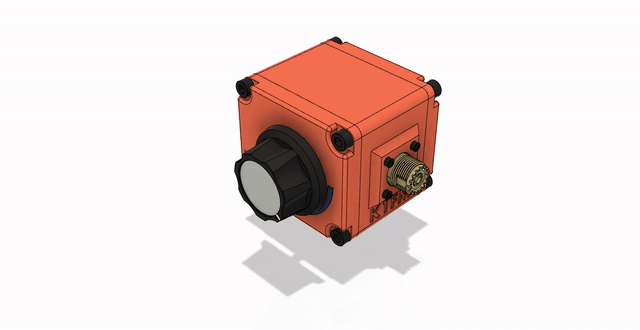
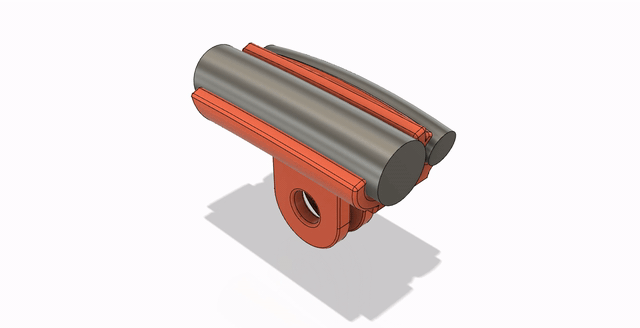
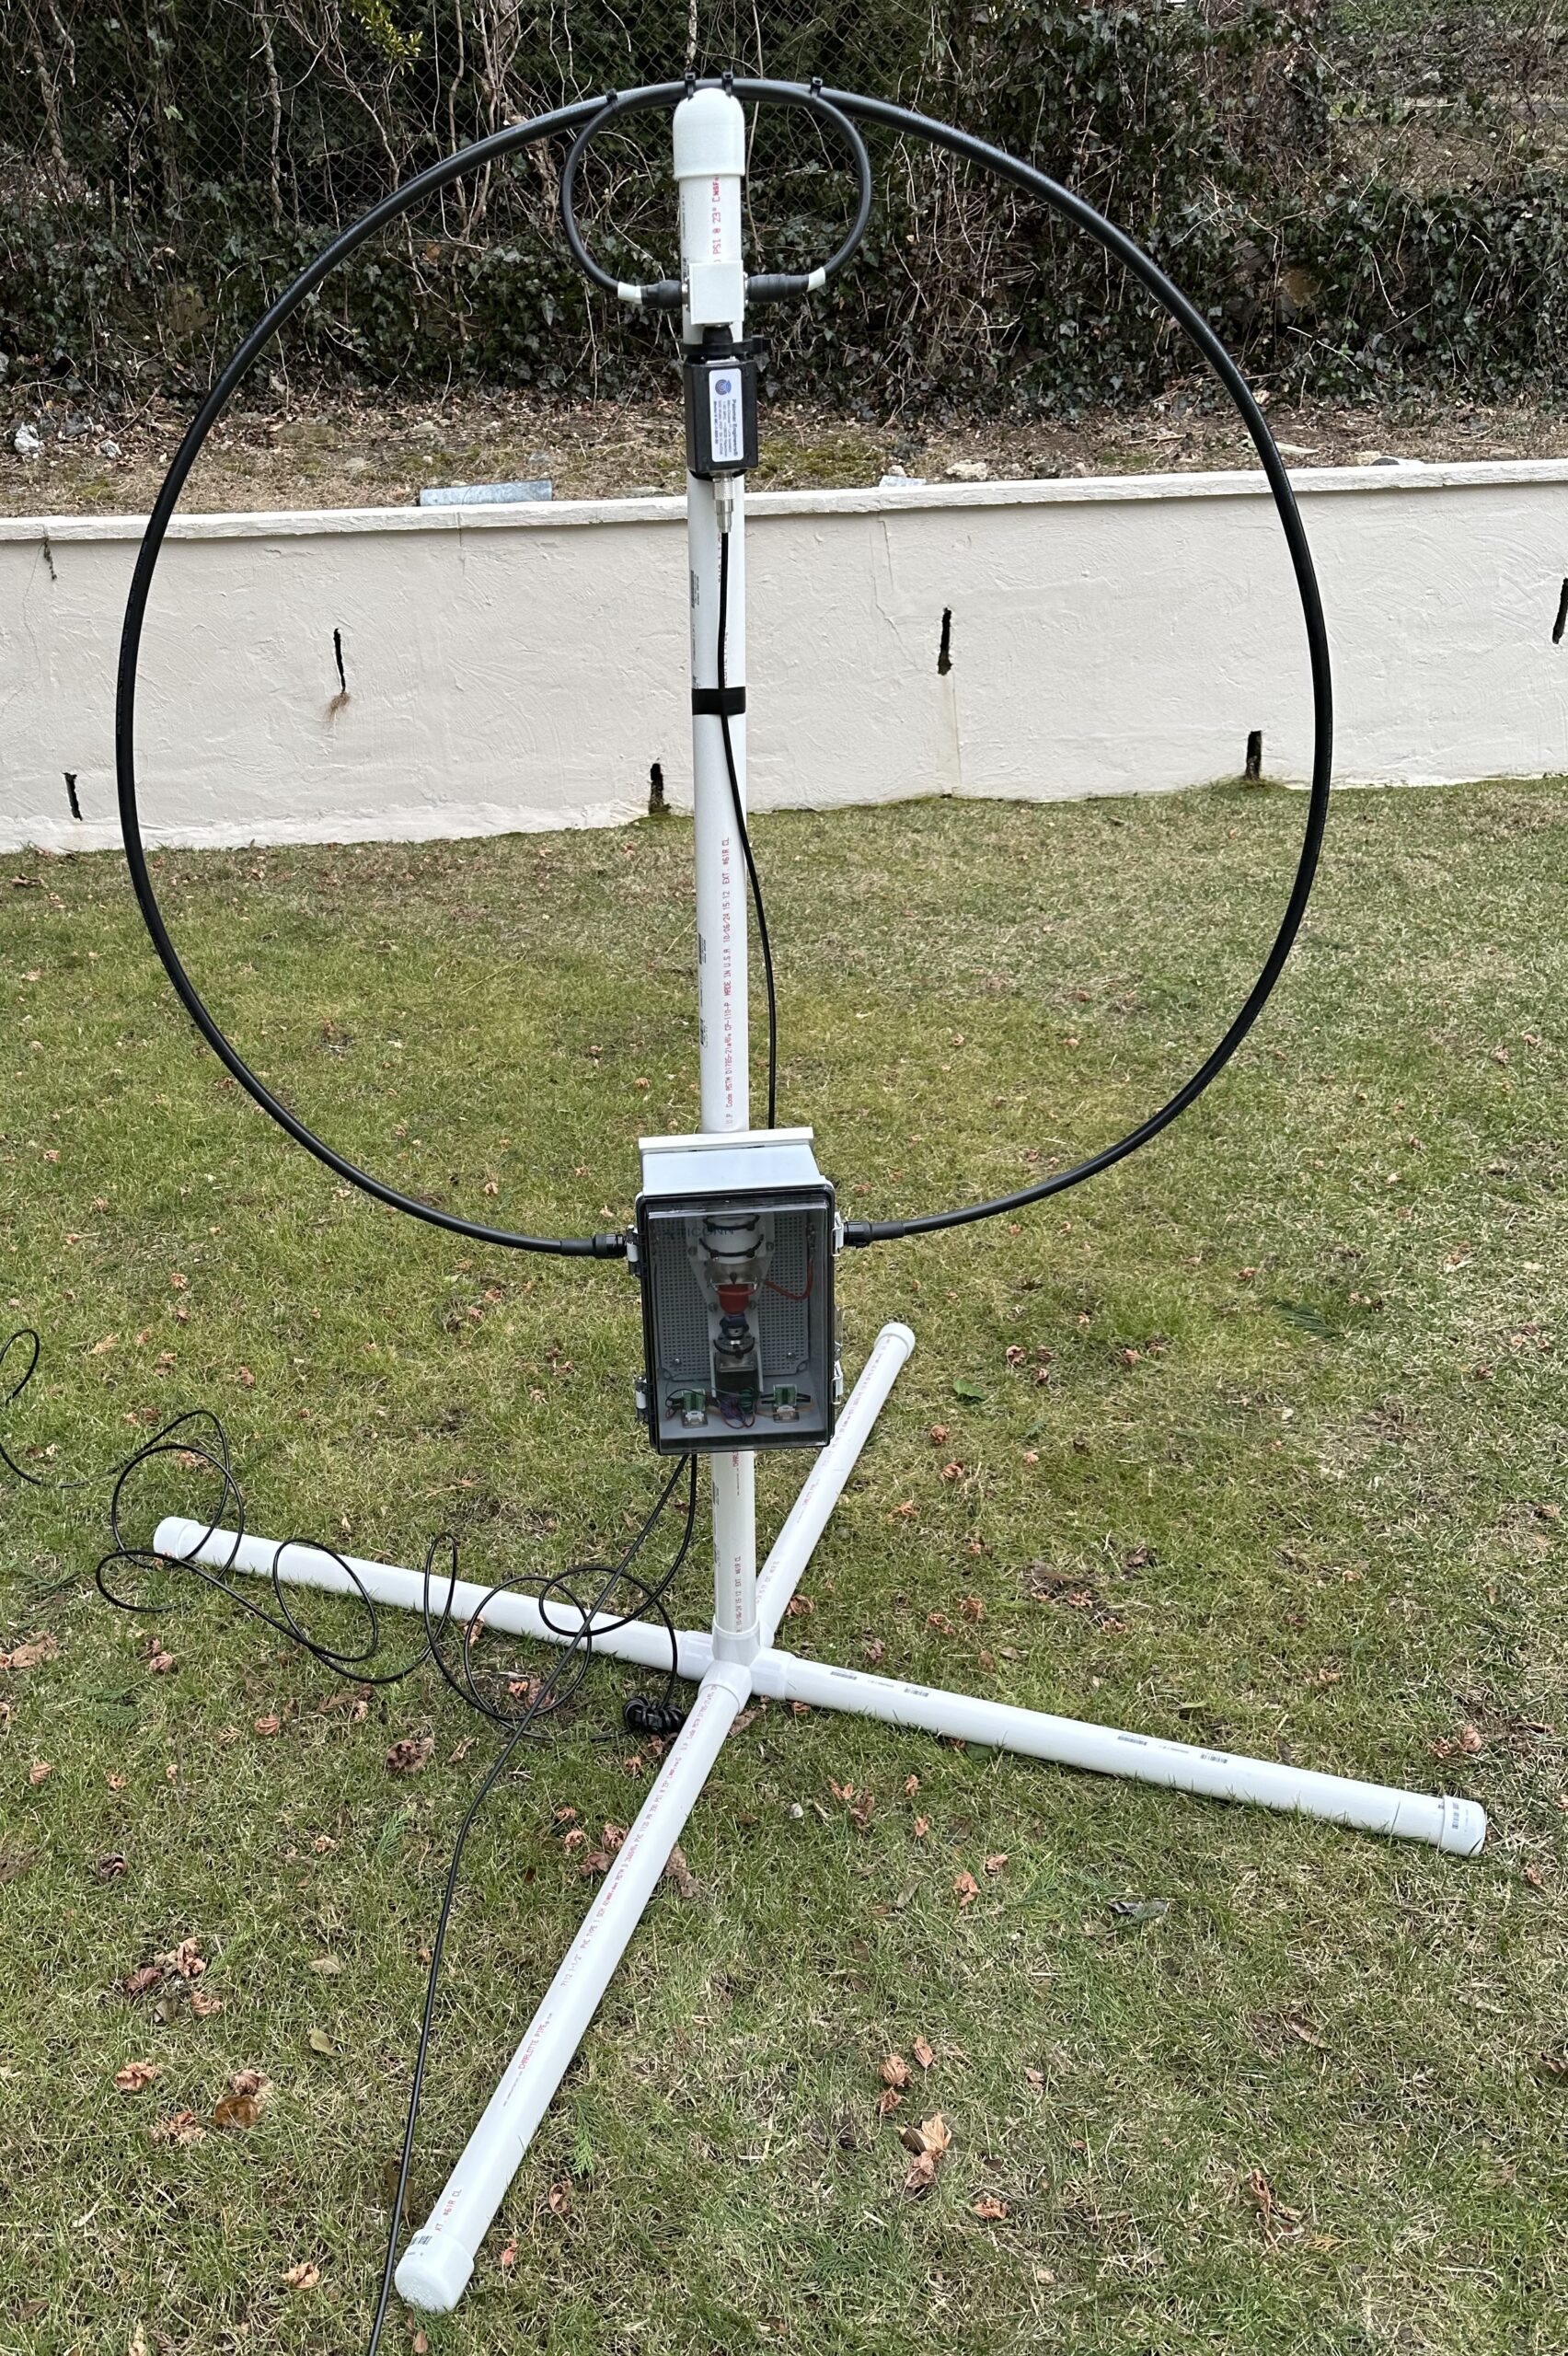
Fully 3D printed, capacitor enclosure
The new enclosure requires no rework in order to be mounted. It is now quickly detachable by using the same mount type as the radiator/exciter assembly. This makes the antenna even more portable and, at the same time, opens the possibility of using other support types in place of the selfie-stick (fishing rods, PVC pipes etc.). The capacitor uses a 3:1 planar reduction that, combined with the a fairly large knob, makes tuning quick and easy. A 3D printed indicator (blue) shows the current shaft position: just by looking at enclosure you can tell where about you are currently tuned and act accordingly when it’s time to tune again.
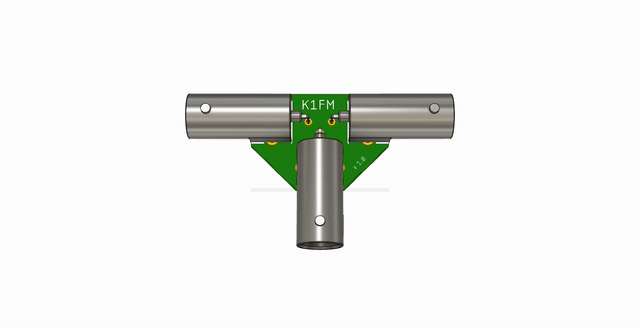
Exciter loop splitter
Thanks to a new splitter design, the exciter loop is now conveniently made out of a standard LMR240 BNC-male to BNC-male pigtail. The splitter also allows the possibility of using multiple radiator/exciter assemblies in order to, for example, work 6 meters.
Radiator loop mount
I also redesigned the radiator mount to follow the different bending radiuses of the radiator and the exciter loops. Both cables now snap-in with just the right amount of force, therefore zip-ties are no longer needed.
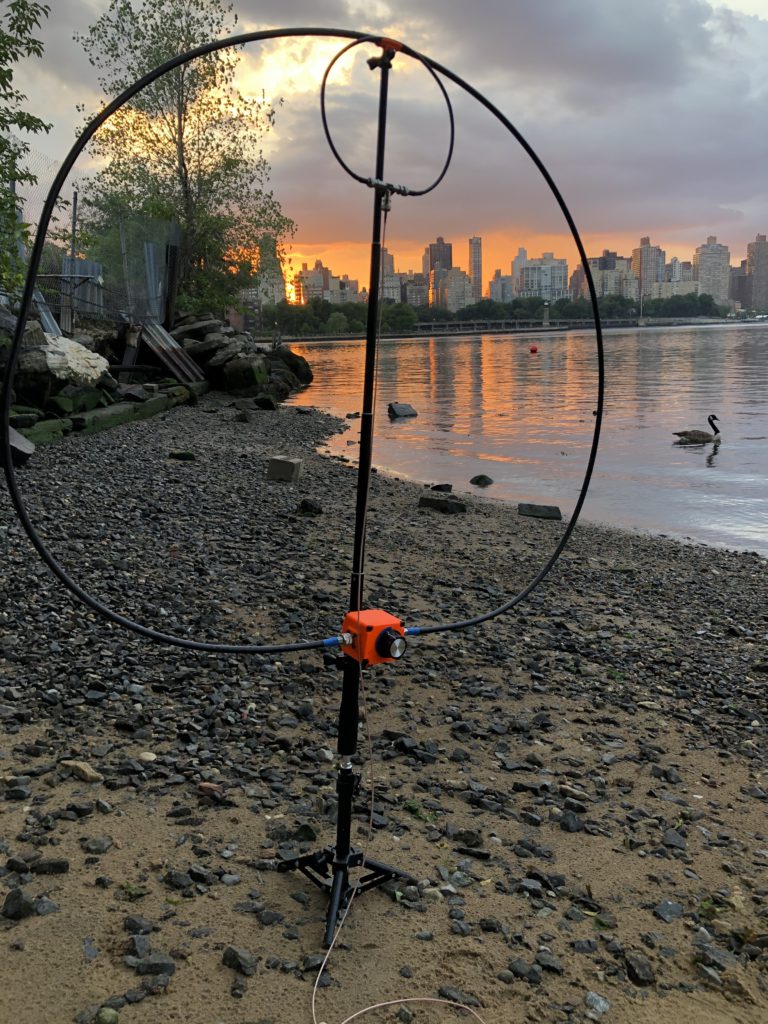
The new loop looks great and works better! I’ve decided to call it K1FM-Loop. If you want to build your own, here are the instructions to do that
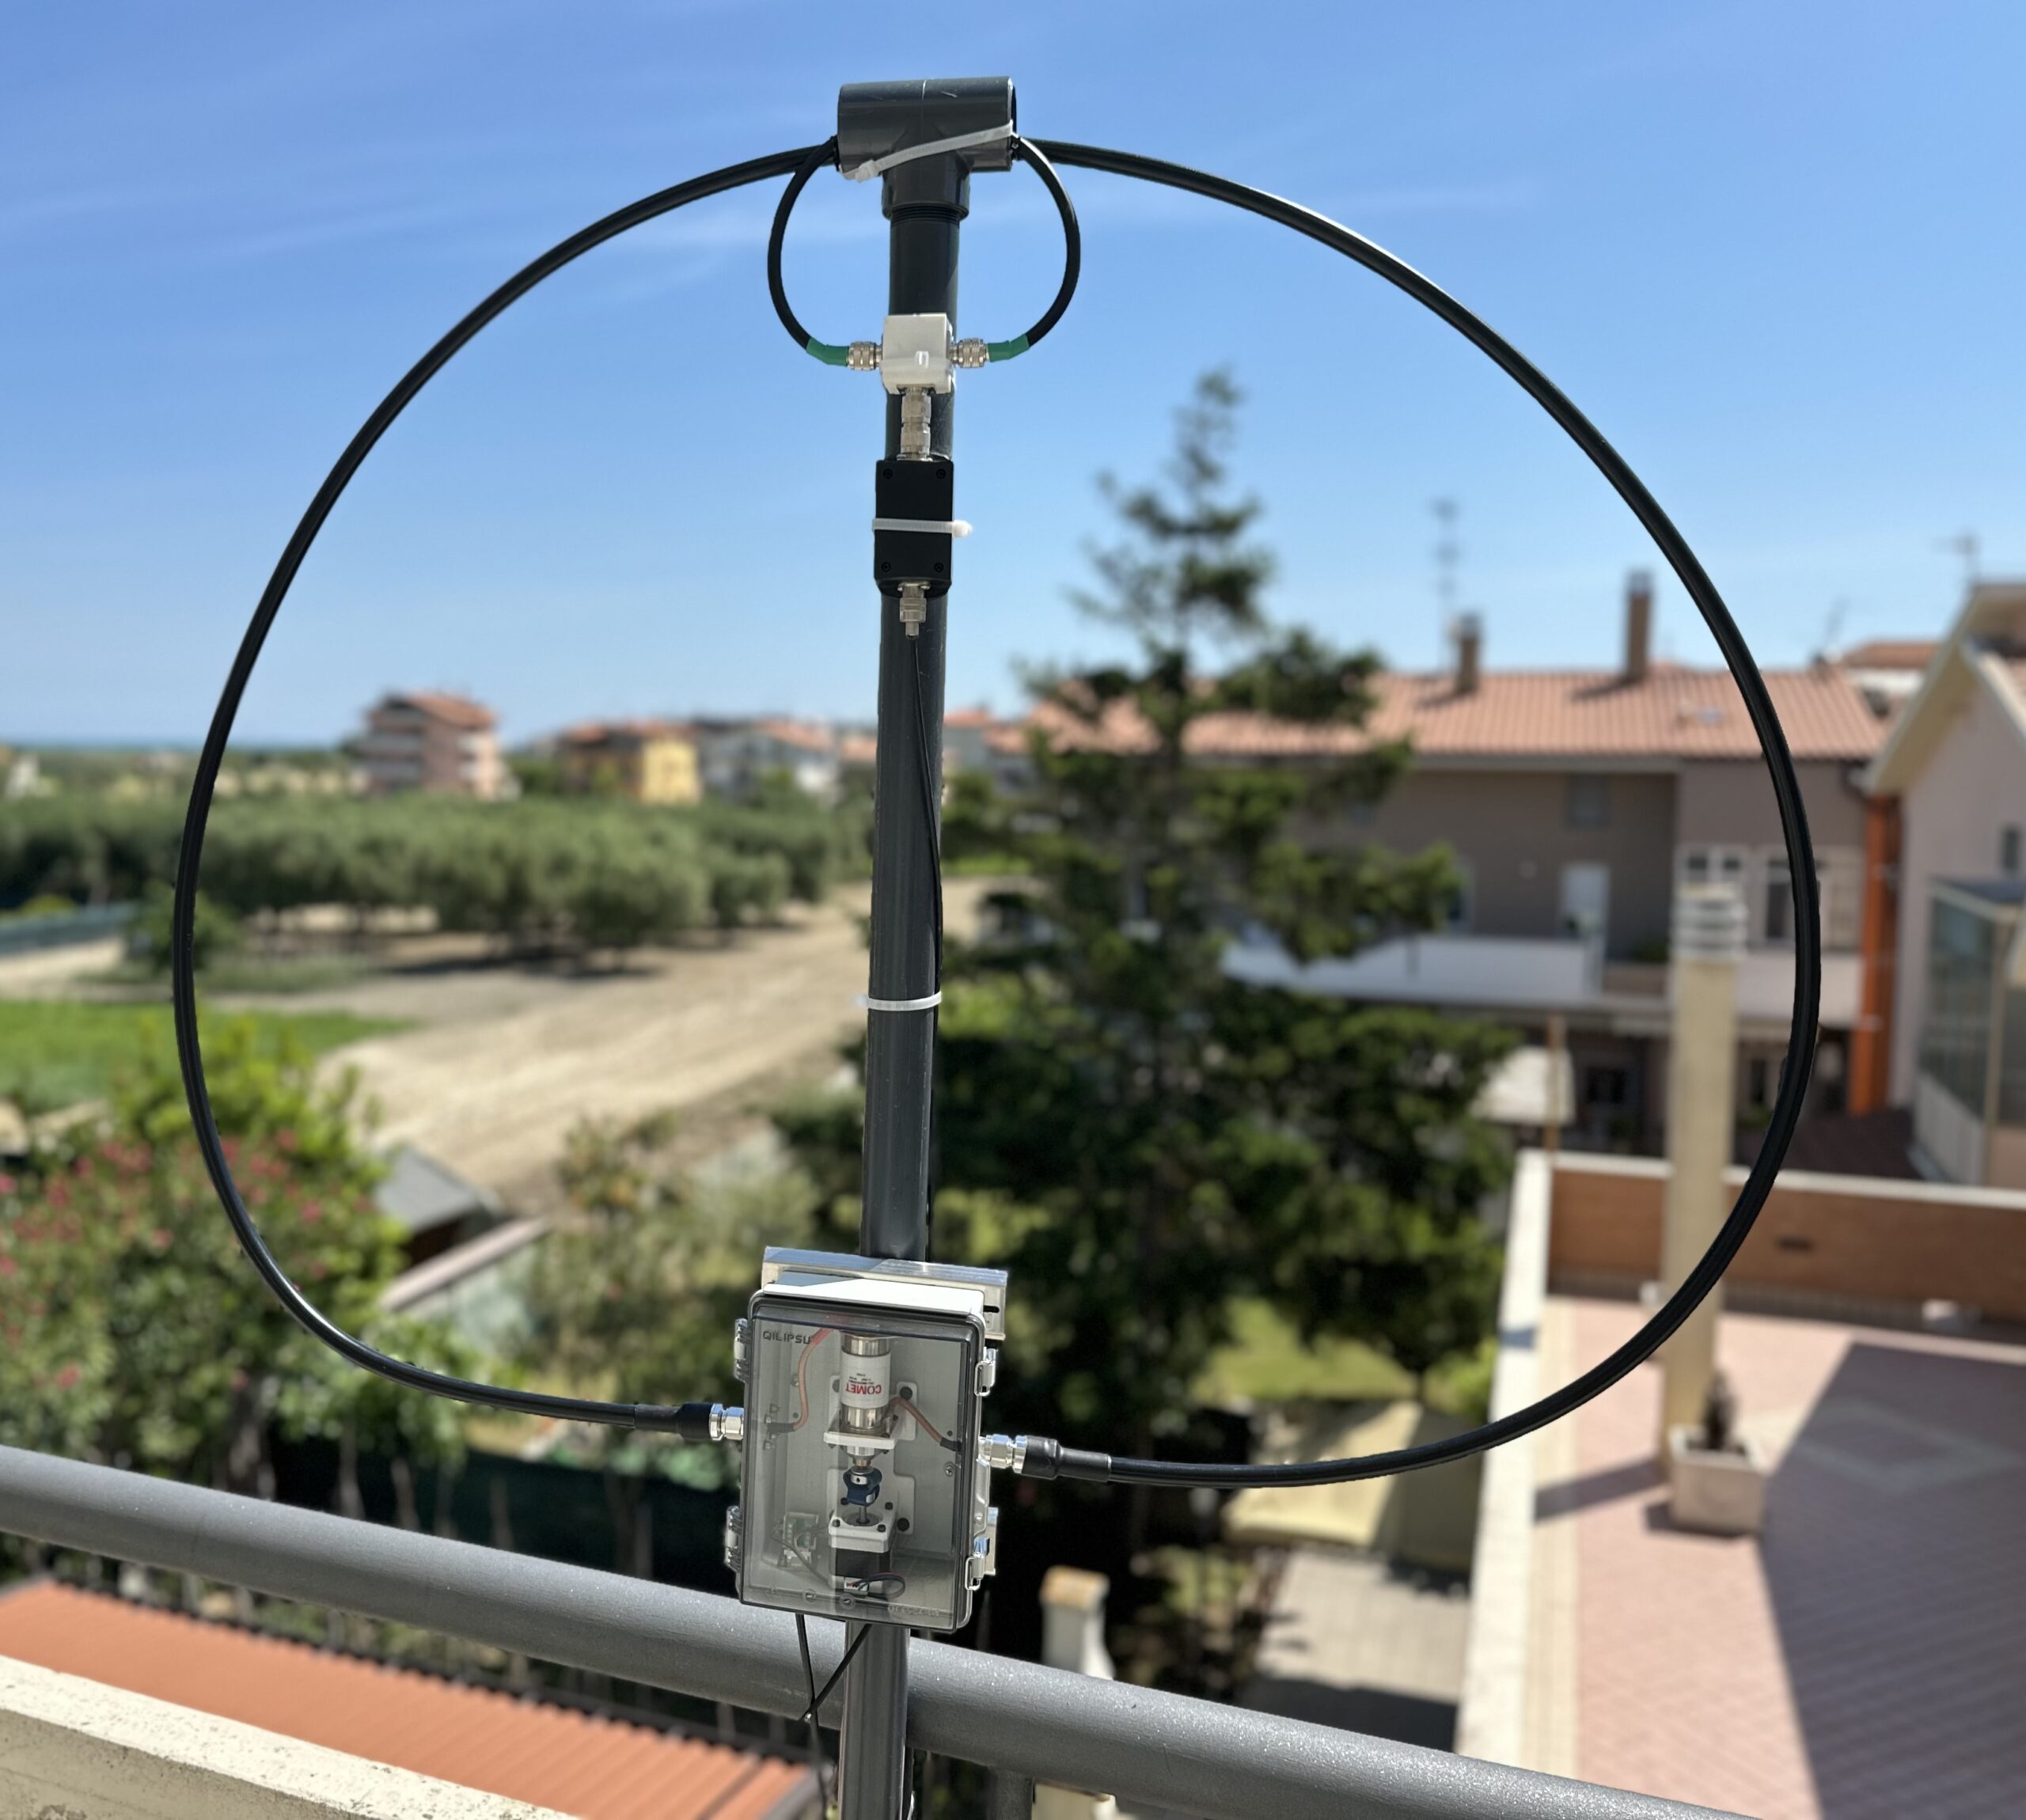
I knew I was going to spend some time in Italy so, for the occasion, I decided to design another QRO loop to be installed permanently over there. I’m calling it the IZ6 Loop.
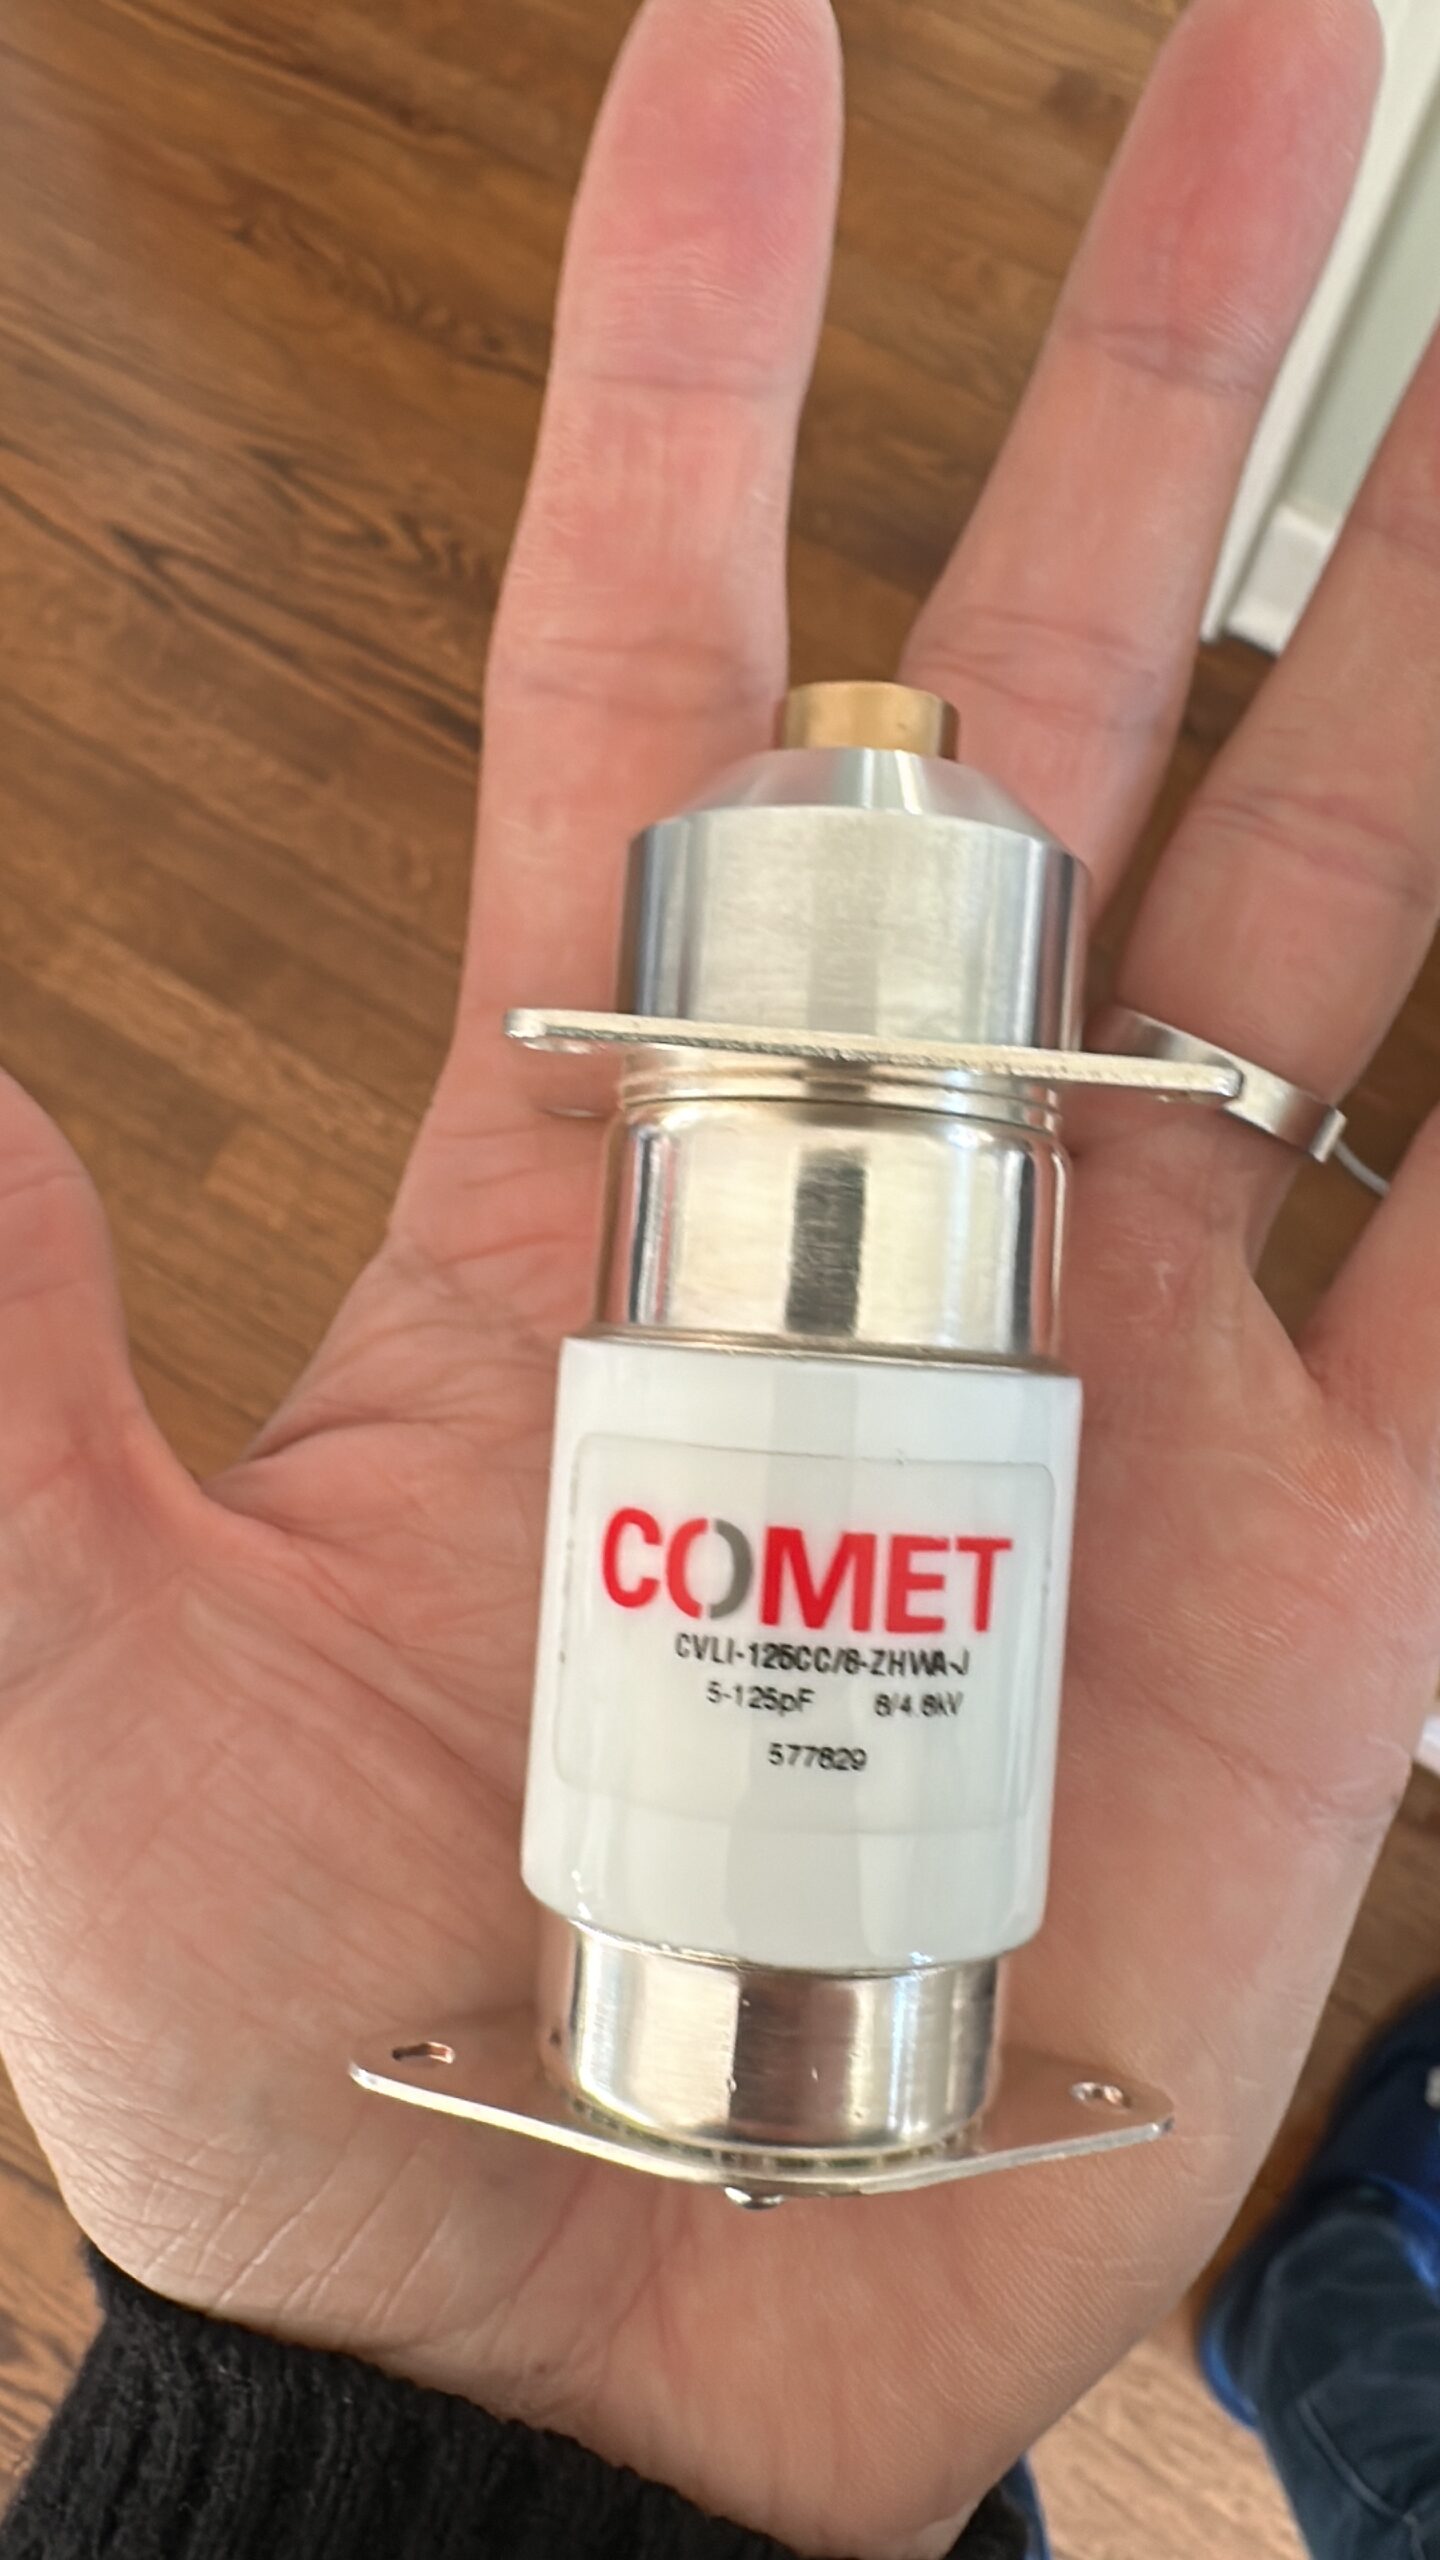
This time I decided to use a smaller capacitor so I selected a Comet CVLI-125CC/8 which does 5-125pF and peaks at 8kV (I got it from Ebay for $149).
The reason for a smaller capacitor is I realized that going above 150pF is generally counterproductive: on the low bands performance isn’t going to be good and – at the same time – the extended tunable range will require micro-stepping and/or gear reductions. The low bands demand a separate, multi-turn (or larger) magnetic loop which would still require less than 150pF.
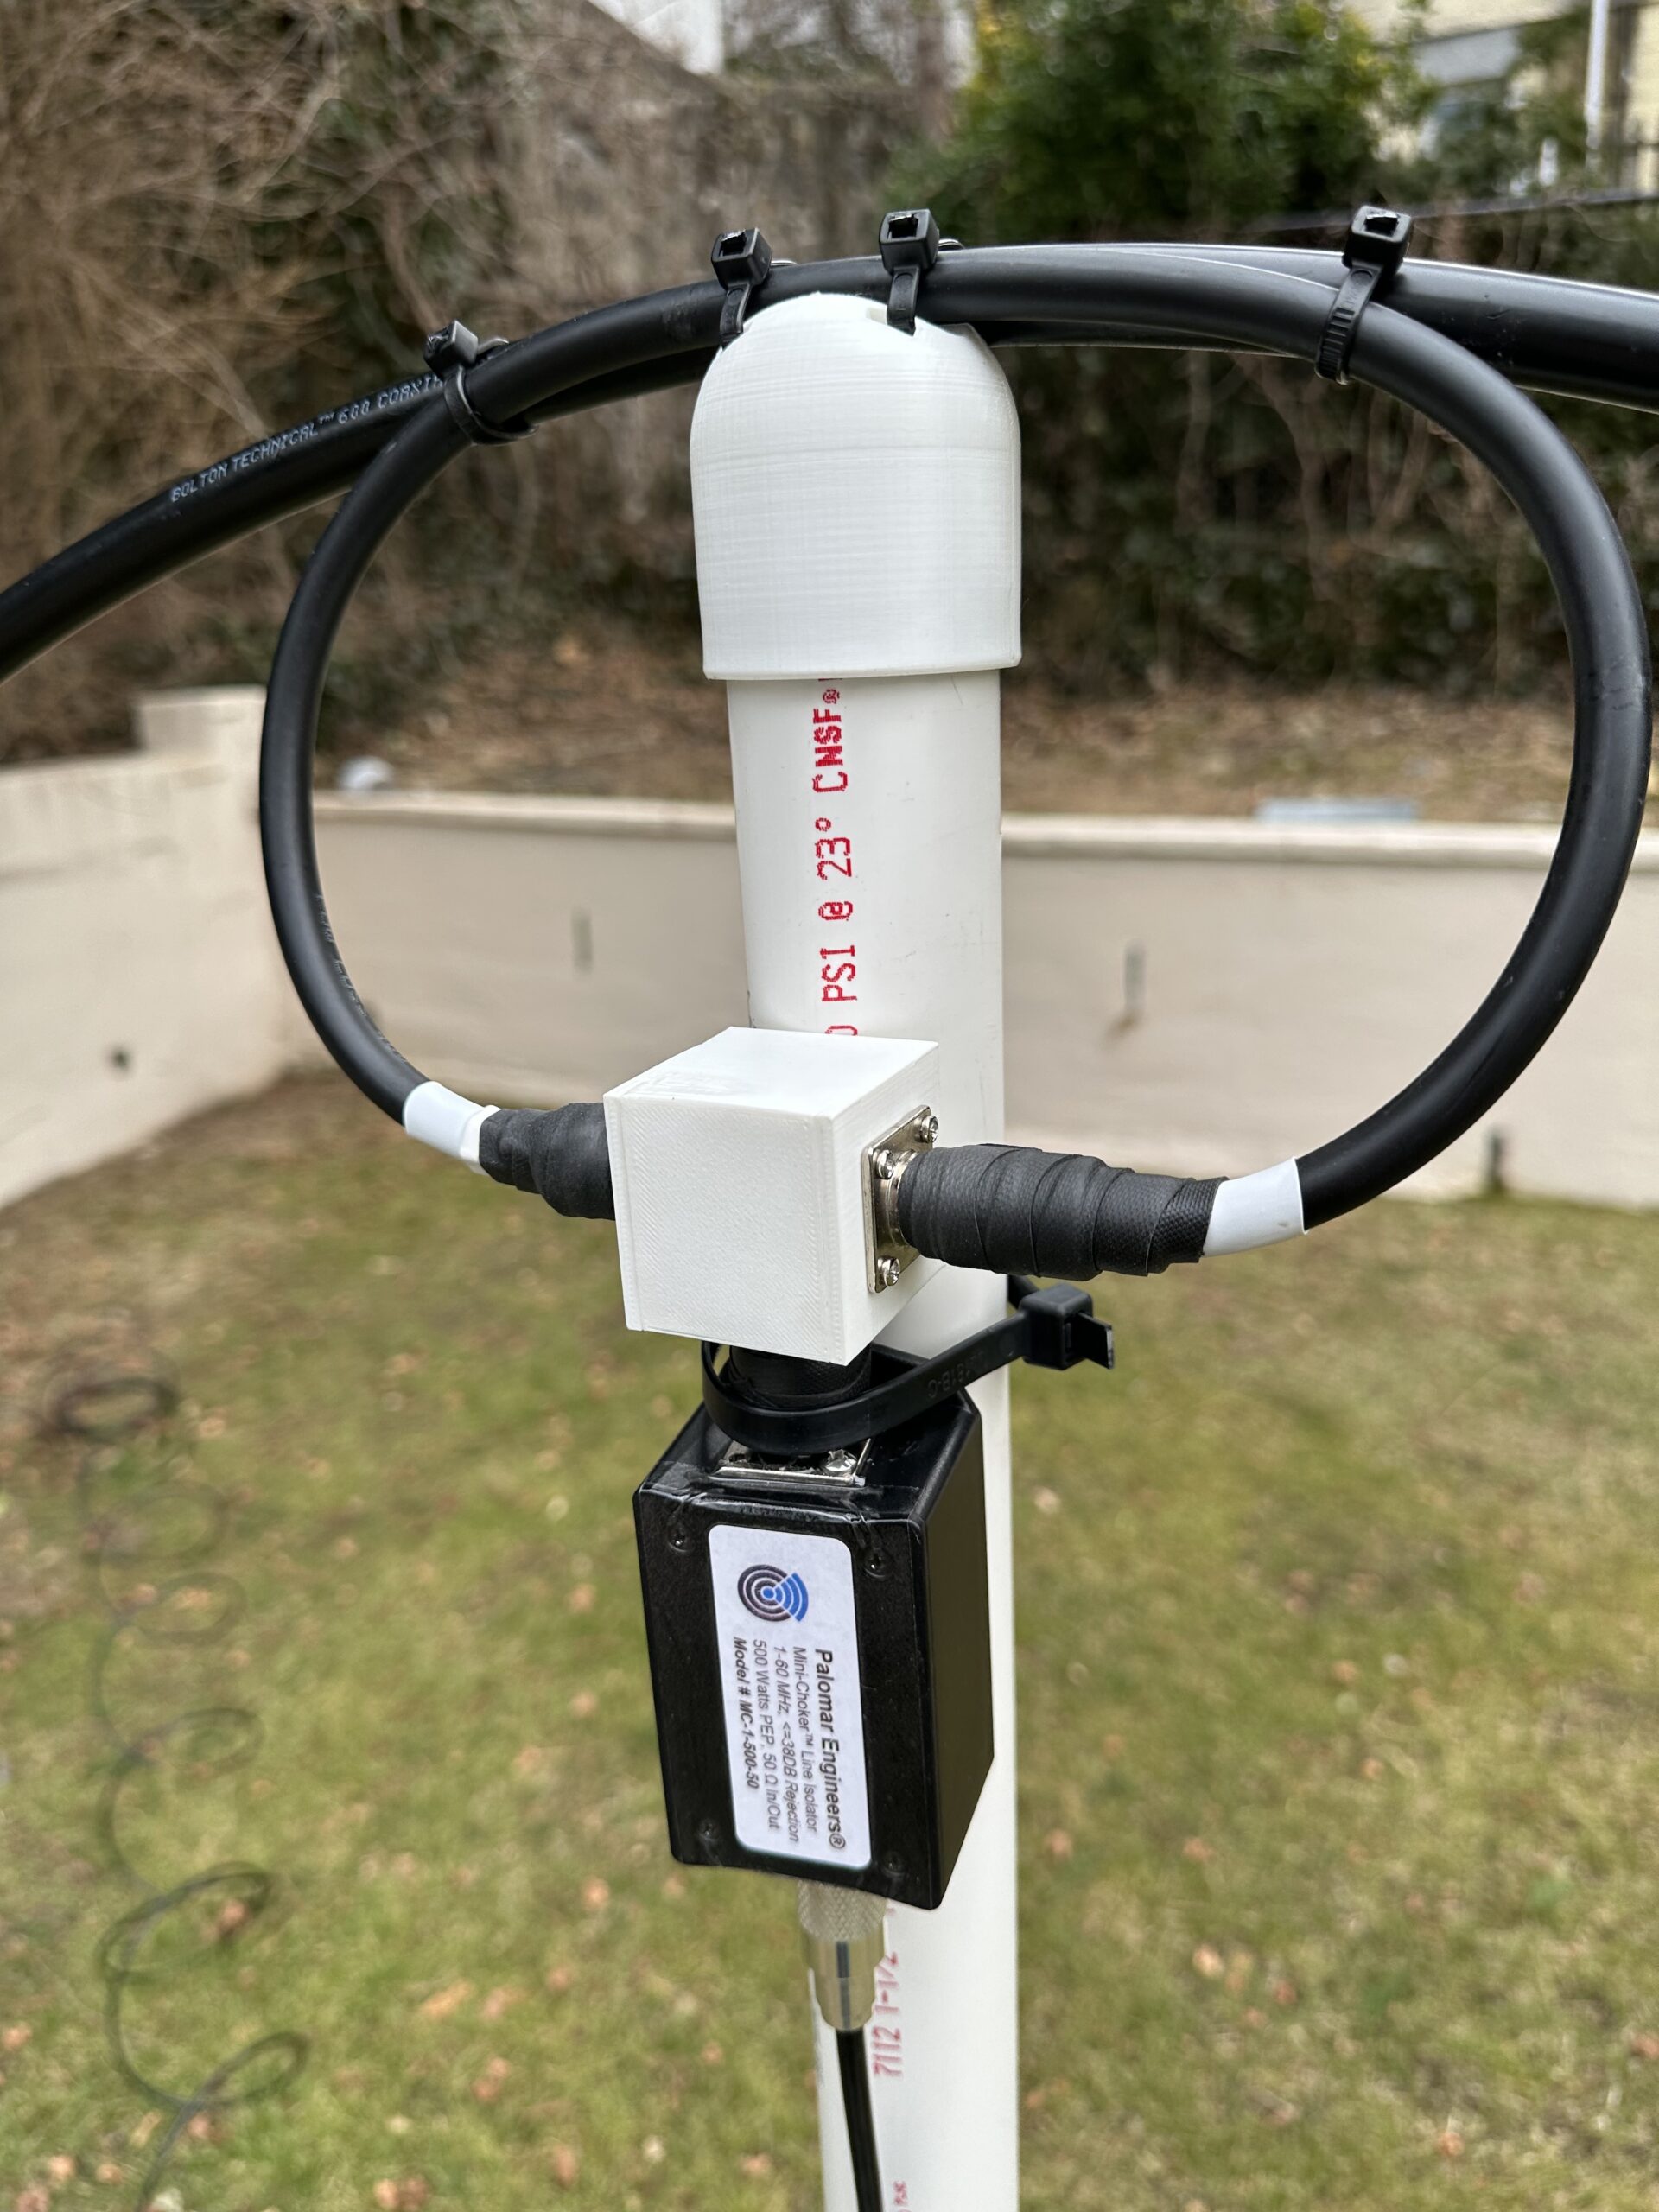
This particular capacitor doesn’t come with a pre-made shaft so I had to draw one. First I printed it in plastic then I decided to have it manufactured in aluminum for an extra $10.
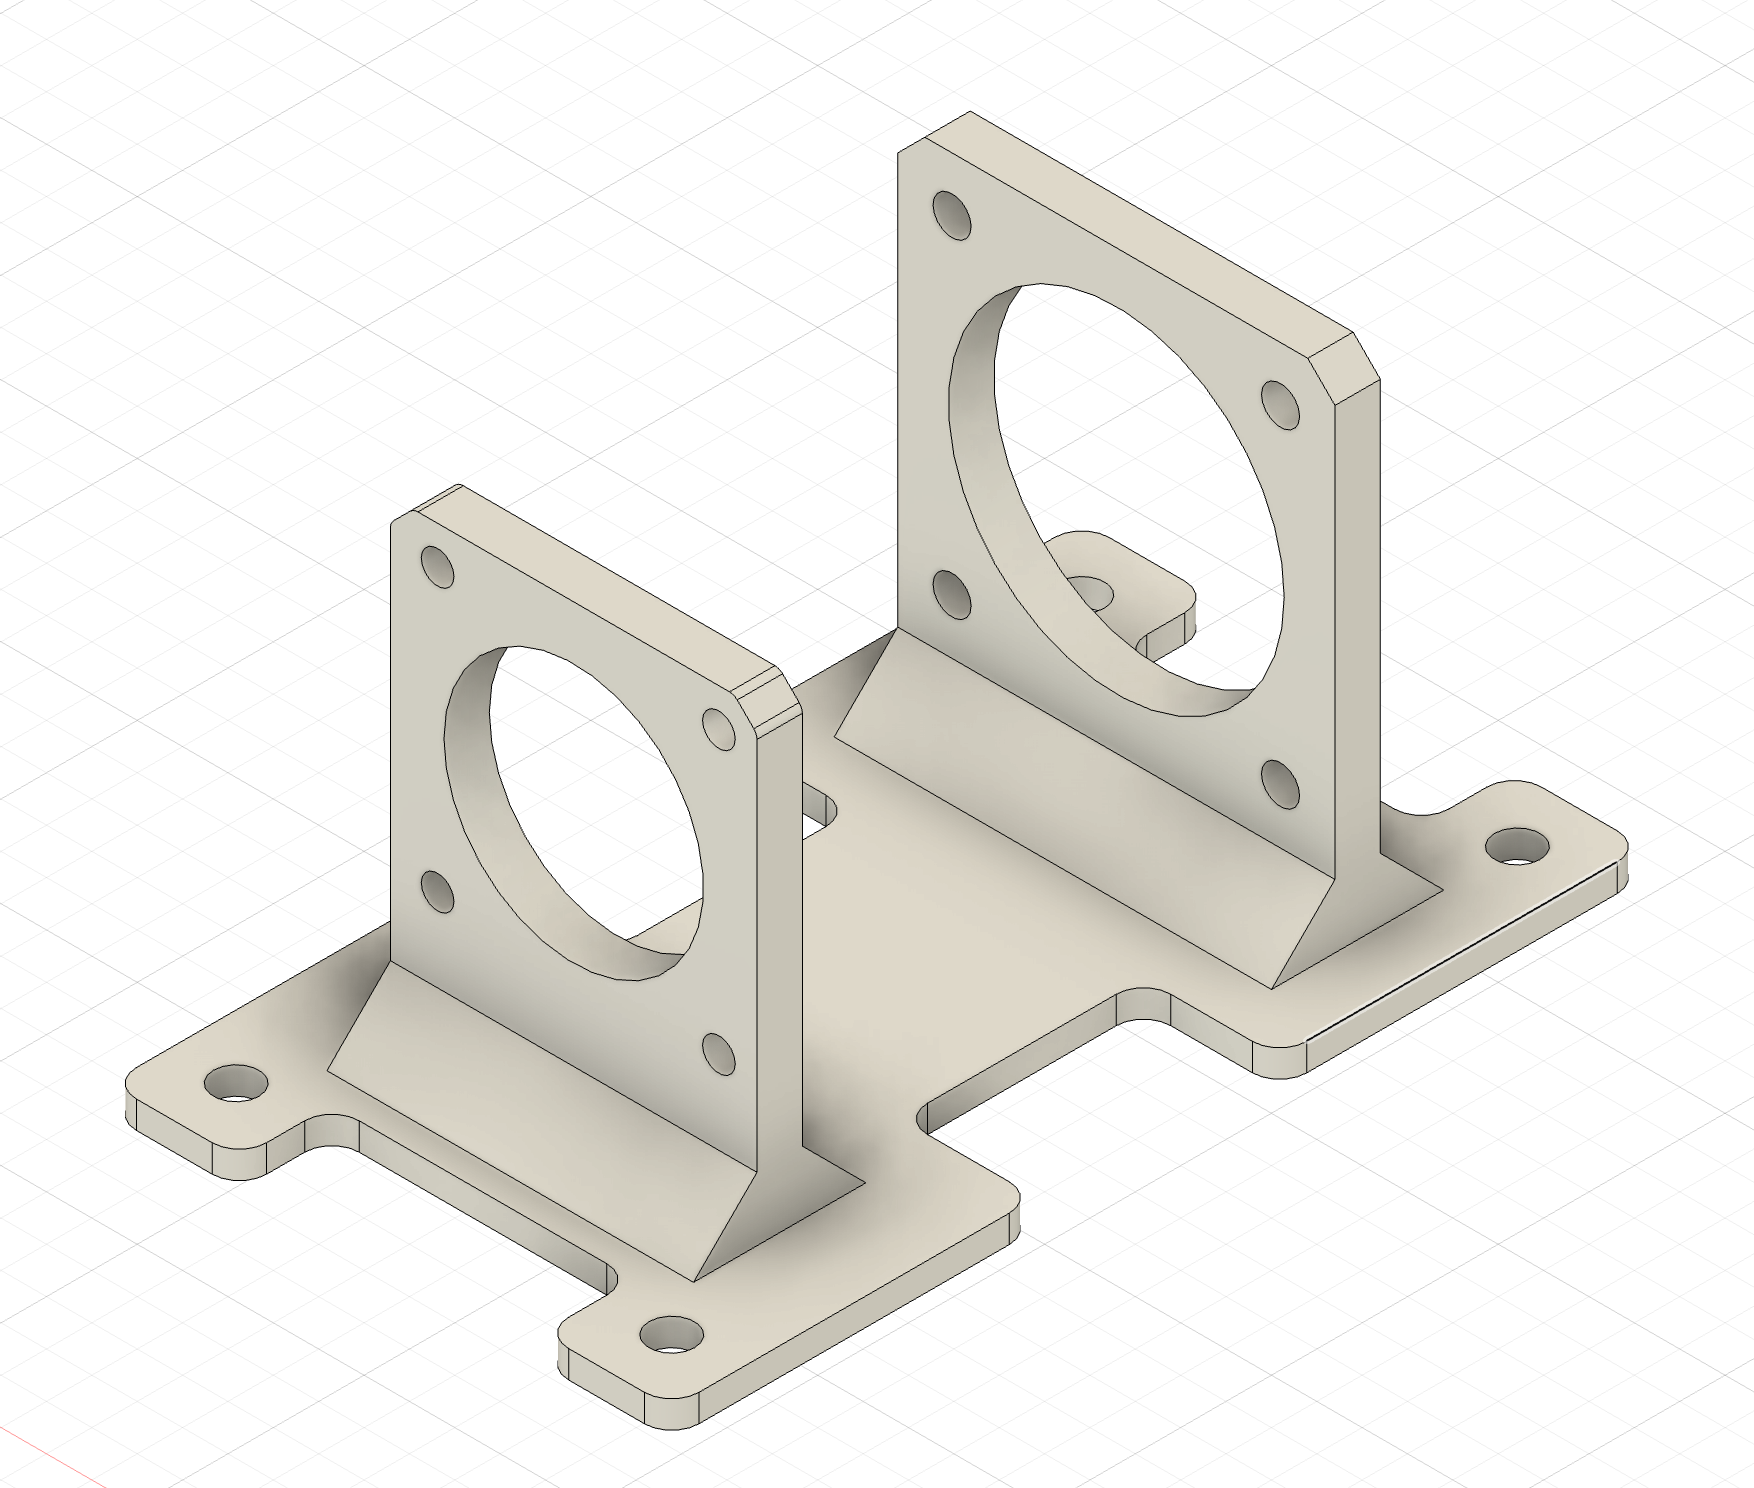
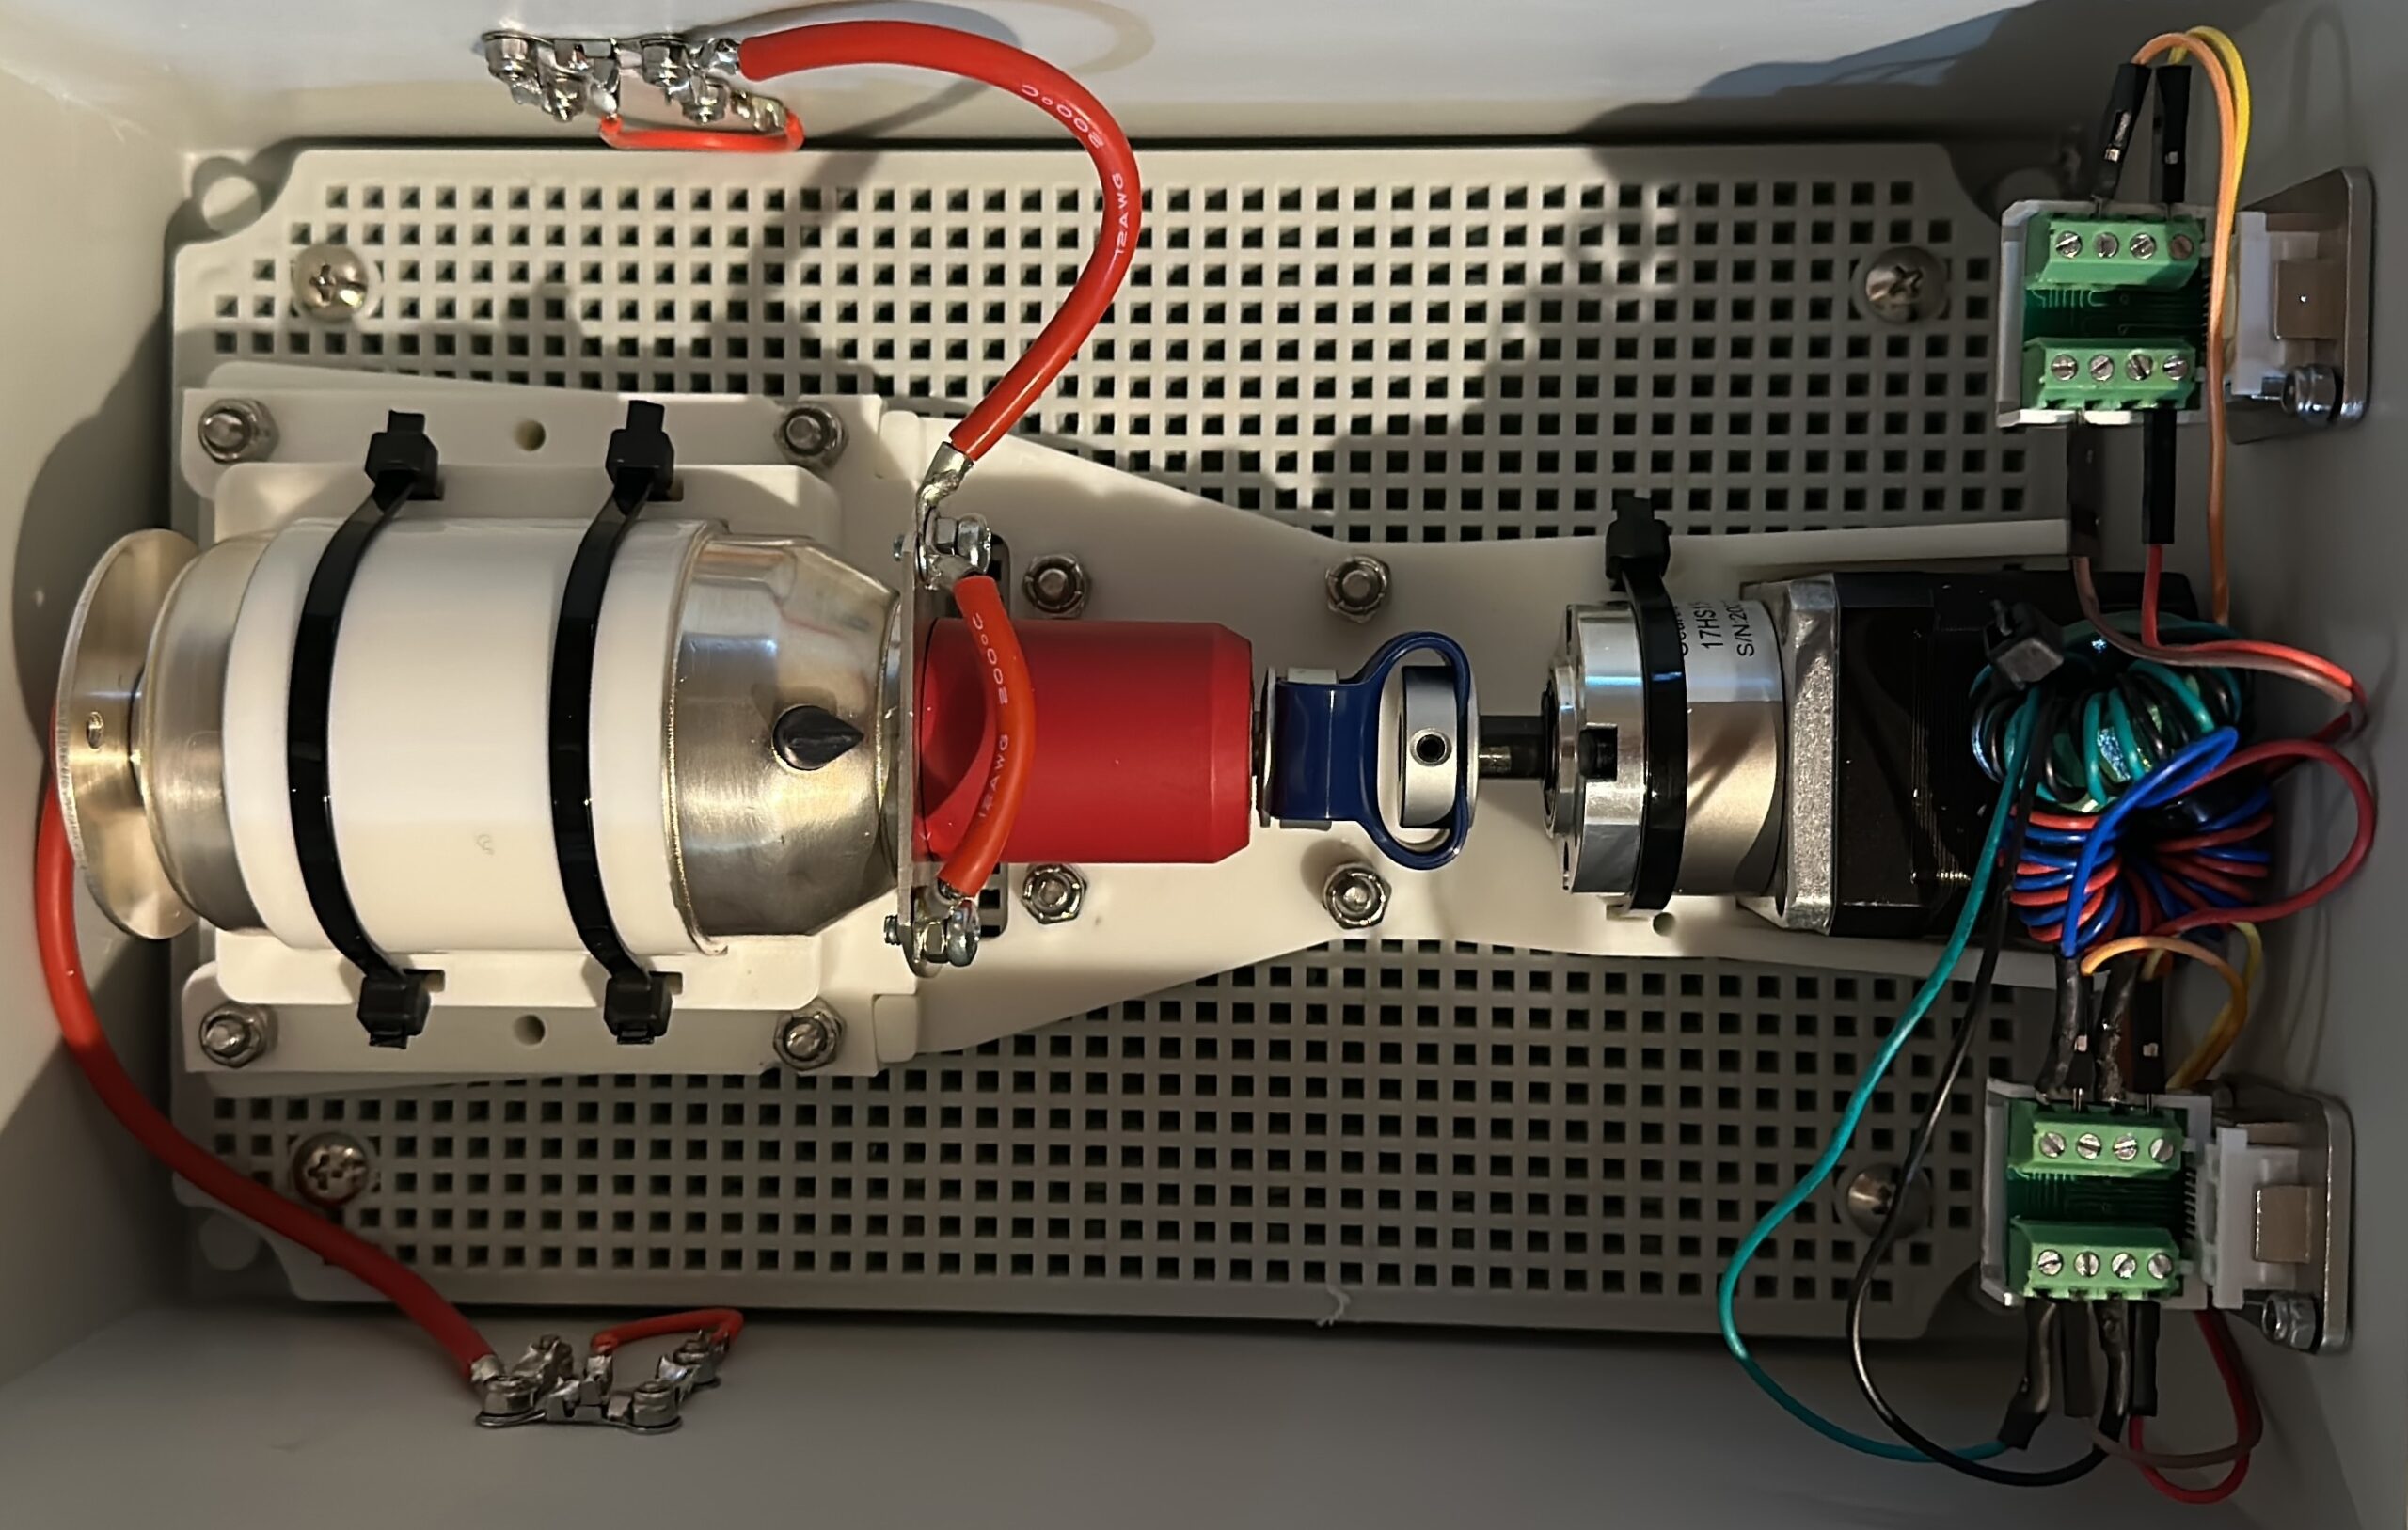
The enclosure I used is of the same kind I used on my other loop, but a bit smaller in size. I’m still using N connectors for the radiator disconnects and ethernet for the control wires. The stepper motor is a simple 38mm NEMA 17. Because of the small capacitor size, no micro-stepping nor gears are needed. I also tried using a 23mm stepper but that size worked unreliably due to lack of adequate torque.
I have designed a simple support to hold the capacitor and the stepper in axis. The support can be printed on most 3D printers and on a large variery of materials without supports.
The exciter loop is made using the quick and dirty splitter I recycled from my last project. This part could be better but, hey, I have a much larger family now (and a lot less time). Radiator is made with 10ft of LMR600 coaxial cable and resonates between 7.4 to around 30 MHz (a slightly longer radiator could also cover 40 meters but performance would be poor).
The rest are standard bolts, washers and nuts. Add a cheap controller, some spare time, a lot of patience and there you go: for less than $300 you have a fully featured, vacation ready QRO magnetic loop.
Results are quite good. So much so that I am planning to install it permanently on the roof, probably with a rotor.
Eric’s design consists of a set of 3D printed supports that allow pole-mounting a Comet CVBA-500BC series capacitor and a NEMA 17 stepper motor with a 5:1 planetary reduction. One notable deficiency of Eric’s design is that it lacks proper housing of the capacitor/stepper assembly and – most importantly – it also lacks a viable control system.
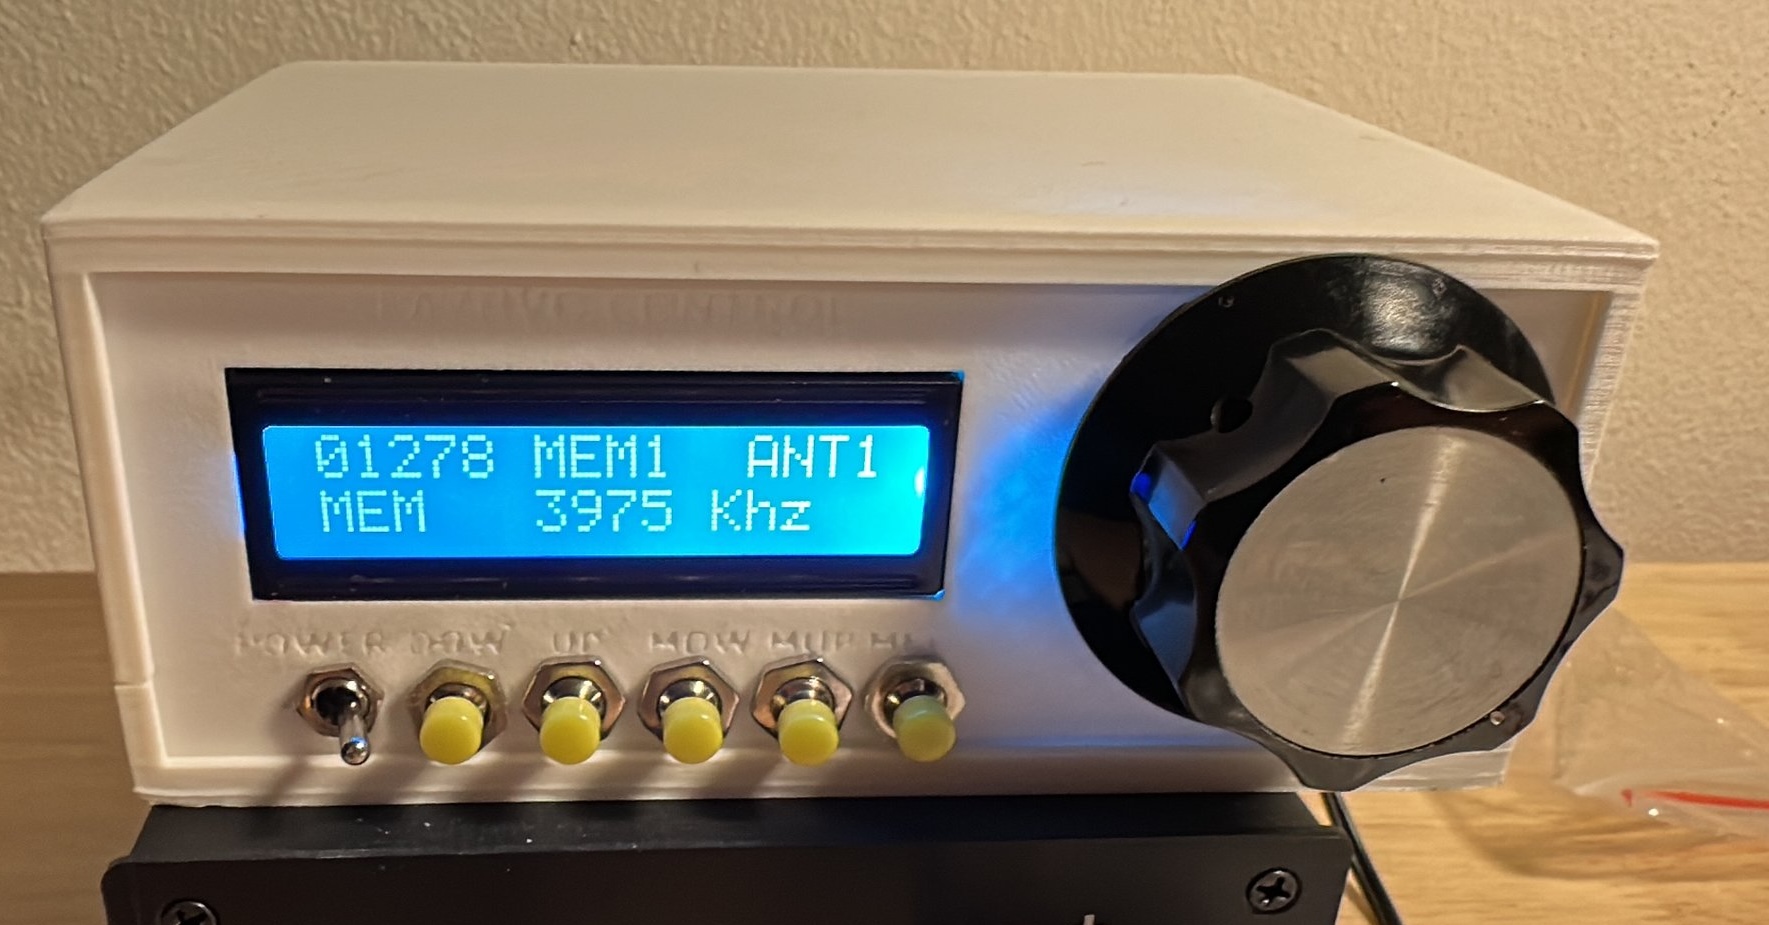
That is where Jose’s controller came into play. Based around the venerable Arduino Uno board and a Pololu A4988 stepper driver hat, the controller is simple yet fully functional and battle tested by dozens of previous builders.
Loop Structure
In order to make the antenna construction quicker and simpler, I decided to avoid using copper pipes and replace them with LMR600 coaxial cable. In all honestly I didn’t even know LMR600 existed (I would have used LMR400) but then I was “inspired” by preciseRf’s HG3 QRO loop design and decided to use LMR600 instead.
LMR600 as a radiator coax is good and bad: good because it is larger and stiffer than LMR400, bad because crimping requires special clamps and special connectors. Fortunately I found a cheap pre-made, 10 foot N-to-N assembly on Amazon ($29) so I used that. As it turns out 10 foot is too long (should have been 8 or 9 instead) so I will have to figure out how to shorten that. I ended up purchasing a custom made 8 foot LMR600 equivalent (called “Bolton 600”) directly from its manufacturer Bolton Technical. The cable I received is actually 265 cm long (8.7 foot) and allows the antenna to resonate between 4 and 30MHz.
From Eric’s project I kept just 2 parts, which I had to customize to my specific needs (the capacitor holder had to be cut to fit my enclosure box, the motor holder as well because the motor somehow did not fit).
For the rest, the structure is built on 1-1/2″ schedule 40 PVC pipes. The feed loop is made out of LMR400 with a 3D printed splitter. The enclosure is a standard electric box I found on Amazon and the control cable is CAT5 Ethernet. Two RJ45 connectors are predisposed to carry both the loop control signals as well those for a future antenna rotator.
Capacitor
When it comes about Magnetic Loops, the Elephant in the Room (or in the box!) is the Capacitor. So let’s spend a few words about it. Vacuum capacitors are expensive and hard to find and, you guessed it, mine is no exception. The only chance you have to find one at a “reasonable” price is the aftermarket of used capacitors that were pulled from dismissed equipment. The main source is obviously Ebay but other reputable, specialized online sellers also exist. I got mine from mgs4u.com, a company I have known for at least a decade and that I trust. I willingly paid them $450 for an almost new CVBA-500BC/8 (the /8 variant can handle up to 8KV peak voltage) well knowing that other /5’s (the 5KV variant) were available at around half the price from international sellers on Ebay.
The million dollar question I bet you are asking now is: what kind of power can your antenna handle? Answer: I have no idea. All I know for sure is that it handles 100W without any problem, under any circumstances. By comparing it the HG3 loop, however, I guess that with an appropriate balun it might exceed 1500W SSB (I think – but I don’t know for sure – the H3G uses a 5KV capacitor). As I said this just hypothetical, and I believe my hypothesis will forever remain such because I doubt I will ever use more than 100W.
Given this is a QRO loop, I could not avoid adding a choke balun into the mix. I ended up choosing the one from Palomar Engineer that can take up to 500W, which is more than enough for me.
The project is still a work in progress and definitely requires some adjustments but, as of today, the antenna is up and running.
As it is to be expected from a loop of this size, it works very well above 30 meters and not so well below (a proper antenna for the low bands would require a bigger and/or multiple-spire radiator).
Future improvements
The improvements I am planning to make are:
having the radiator resonate between 5.3 and 29.7 MHz (it currently goes from 3.8 to 28.3 MHz)DONE
reimplement the controller to allow auto-tuning/remote operationDONE
add an antenna rotor that shares the existing control cable
Cost
When finished I will publish more detailed build plans. For now, here is a preliminary parts list:
In part 1 I have described how to setup your RHR account your Mac in order to try EME contacts. This time I will explain some of the operational challenges that you need to understand in order to be successful.
Be advised that I am far from being an expert. In fact I am precisely the opposite as, at the time of this writing, I have logged a total of just 8 valid EME contacts. Still I believe this might be useful to some: If made an EME contact, so can you!
Finding the Moon
This might be unsurprising but in order to do EME contacts you need the moon to be visible. Having no Moon in the sky feels exactly like having no propagation on 20 meters. You just have to wait.
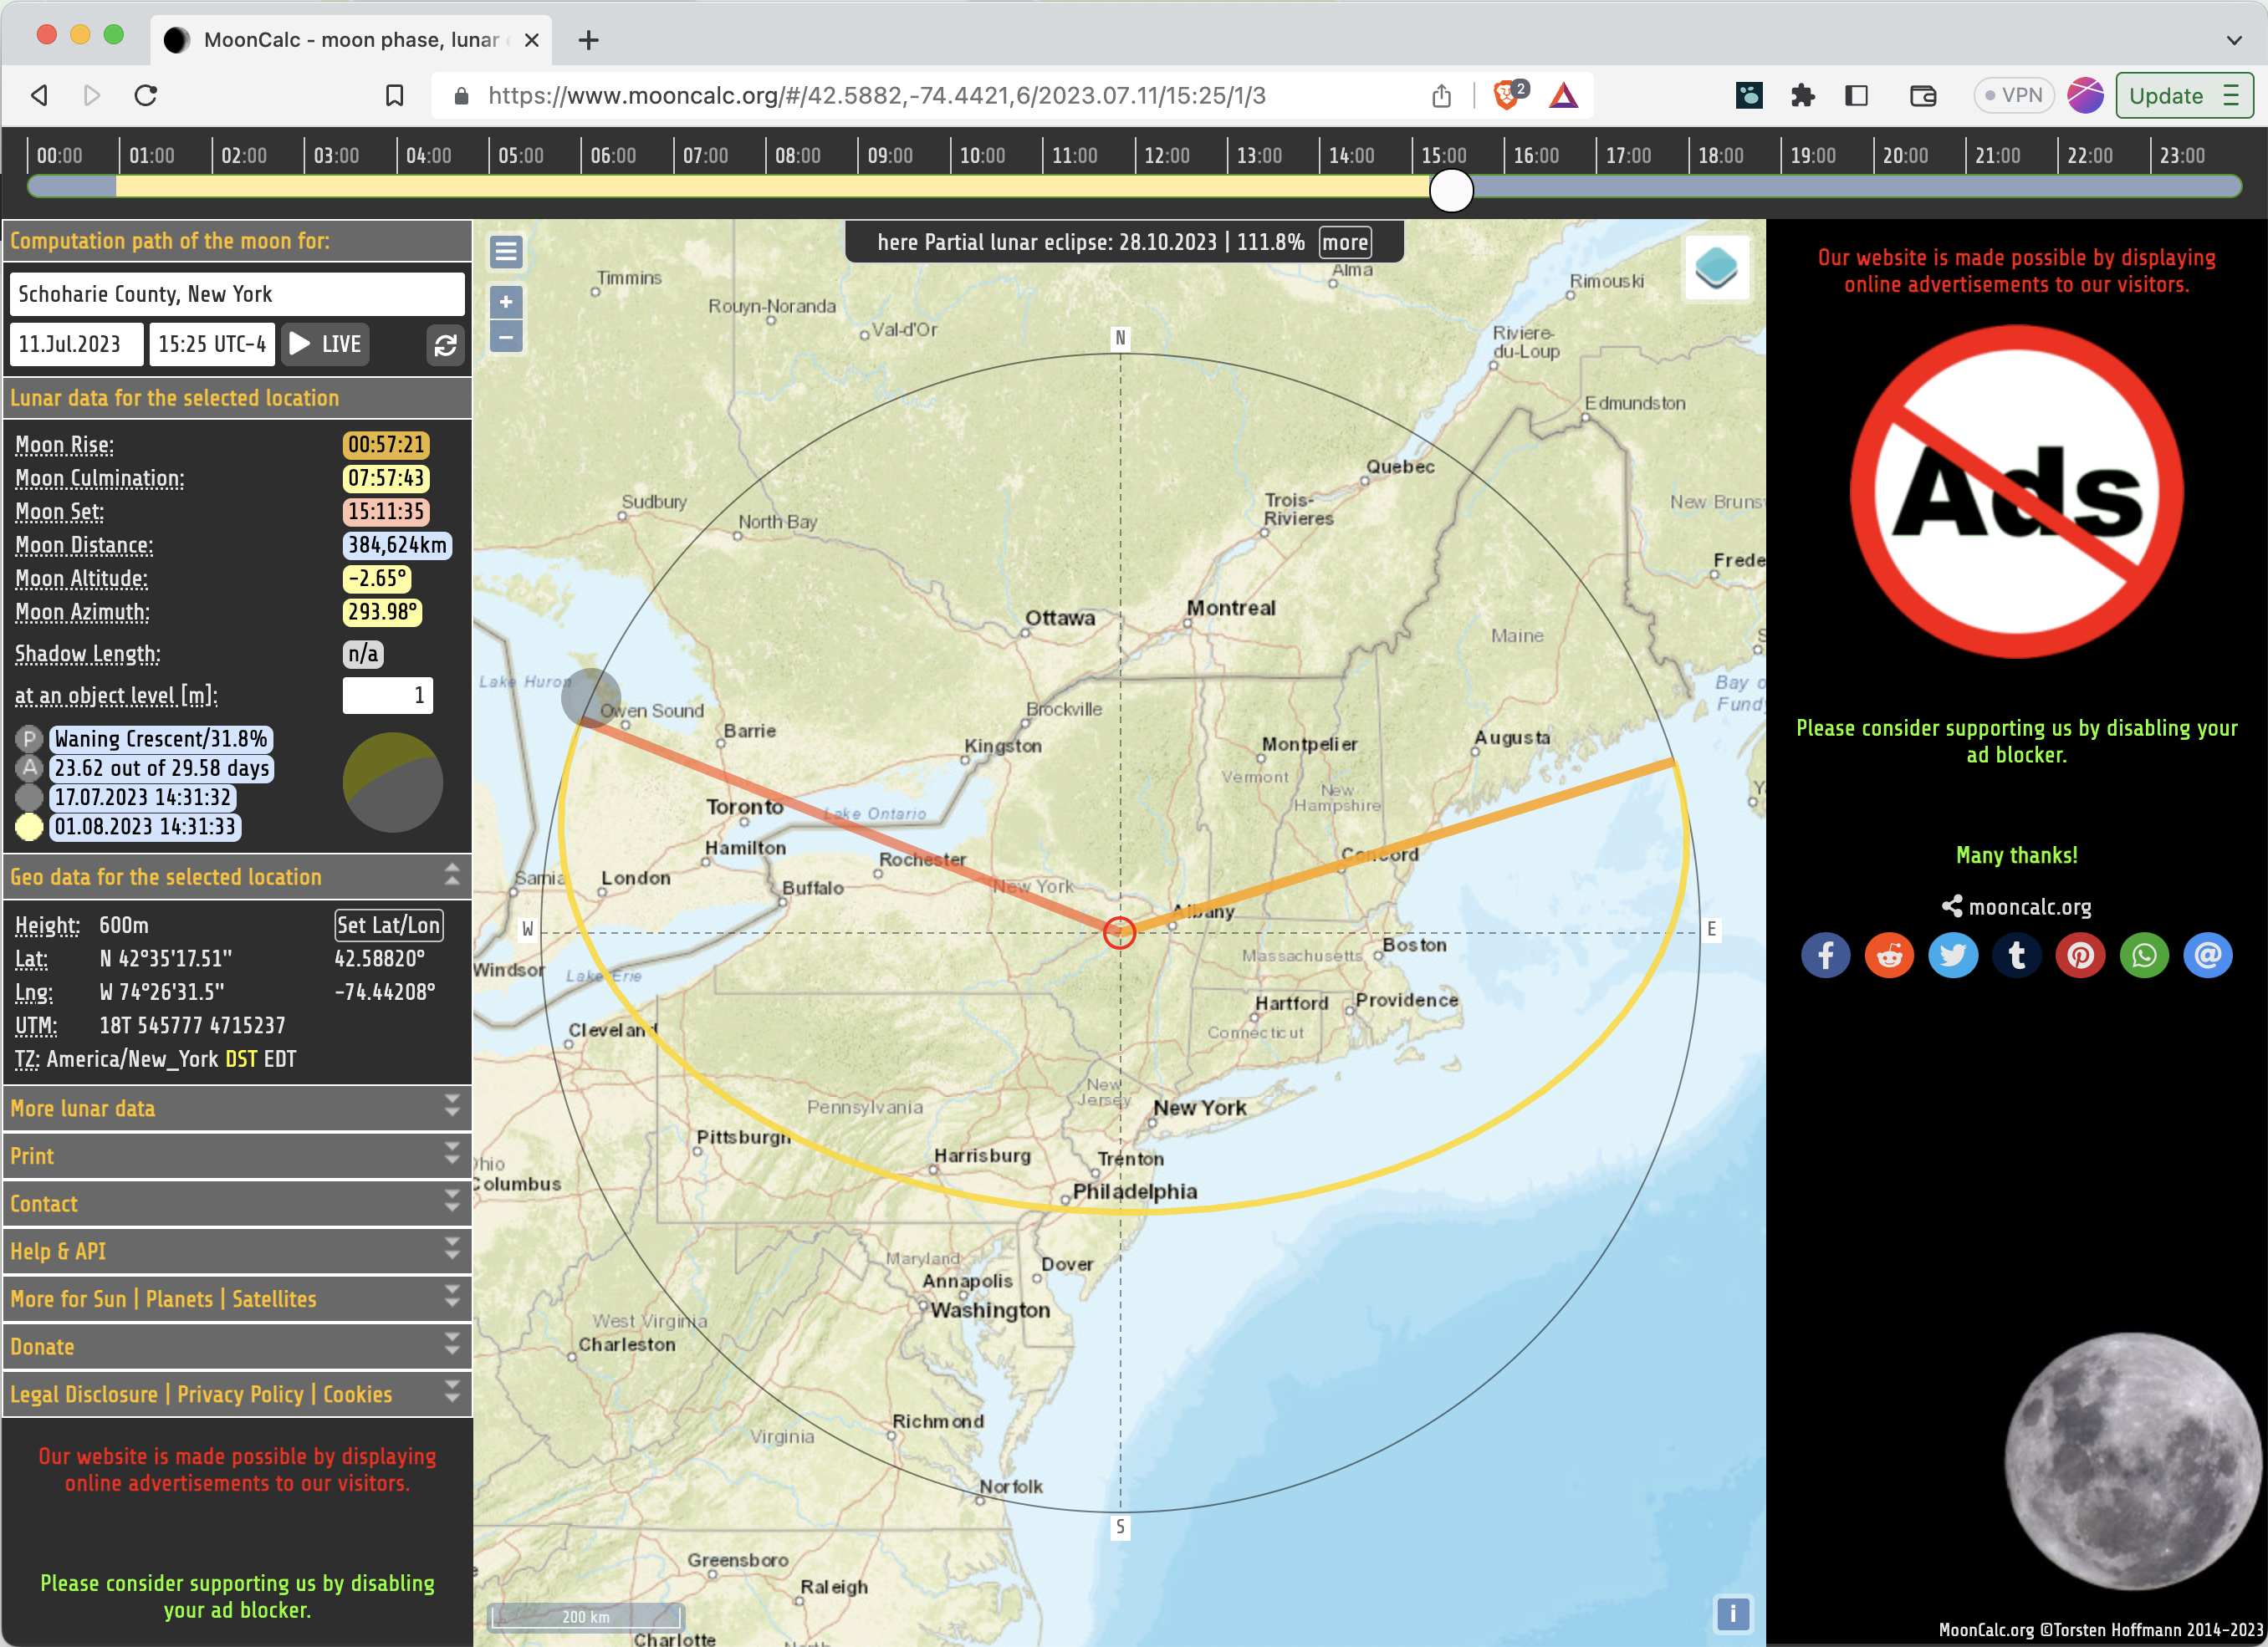
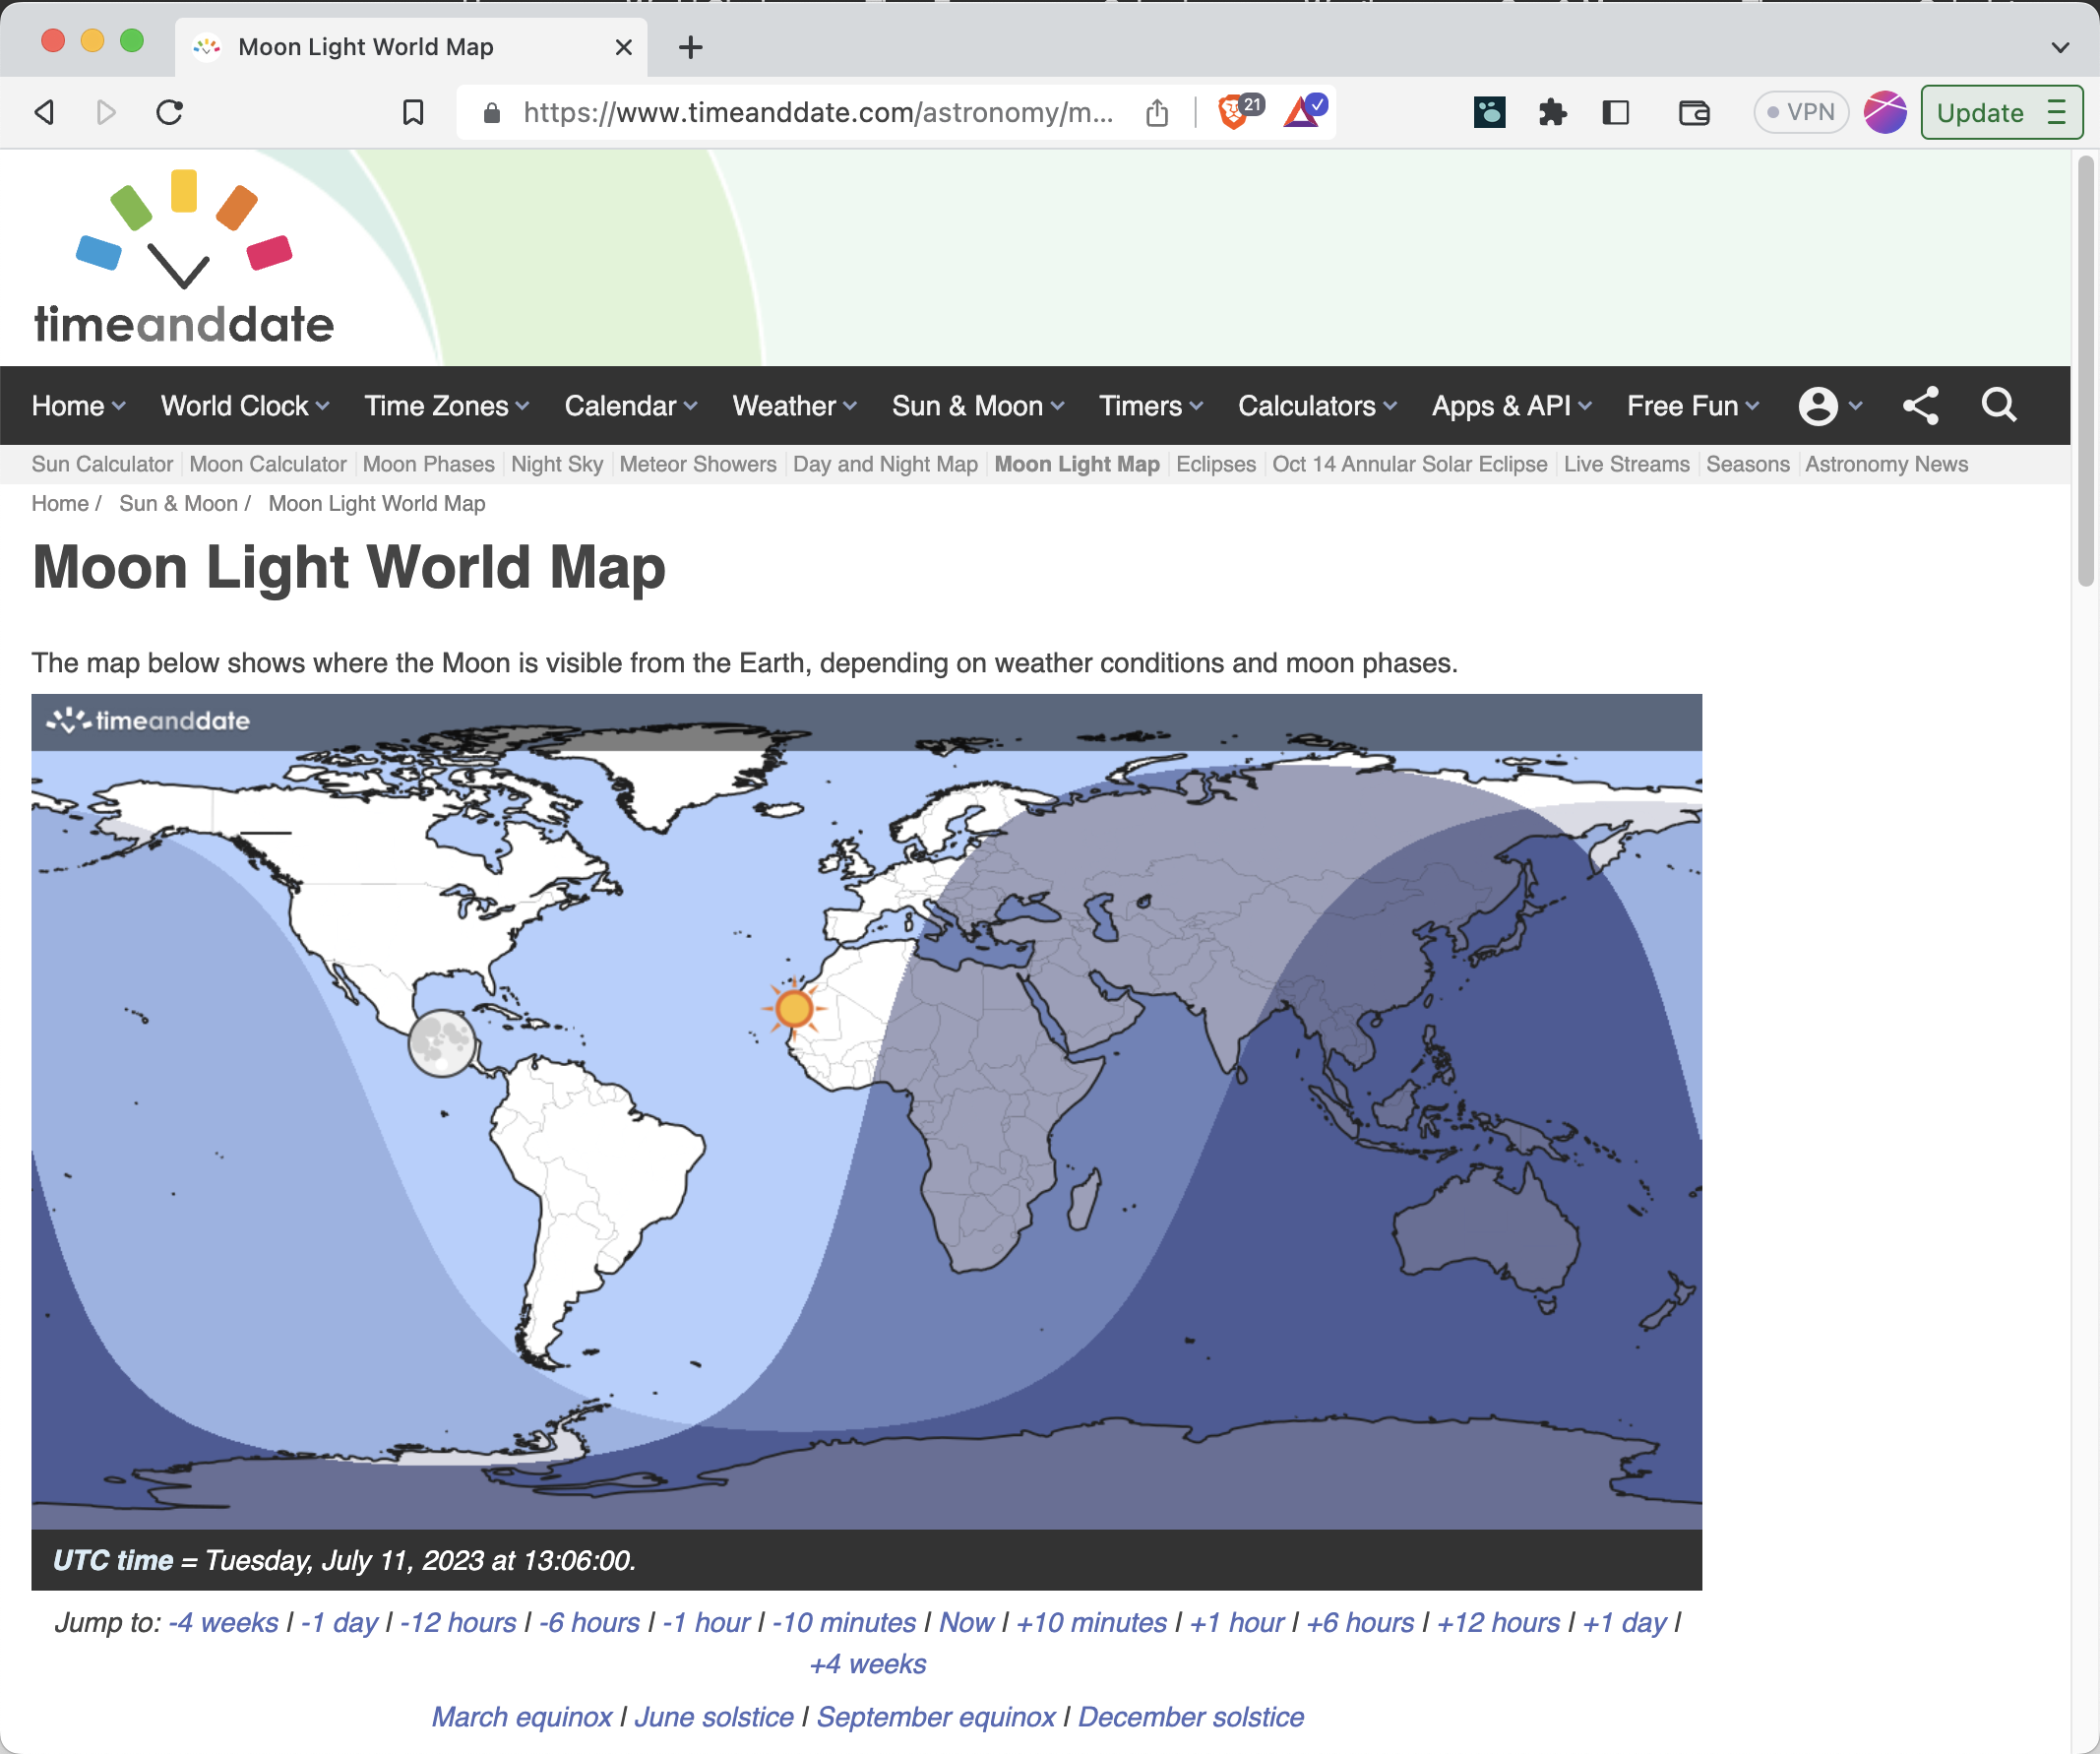
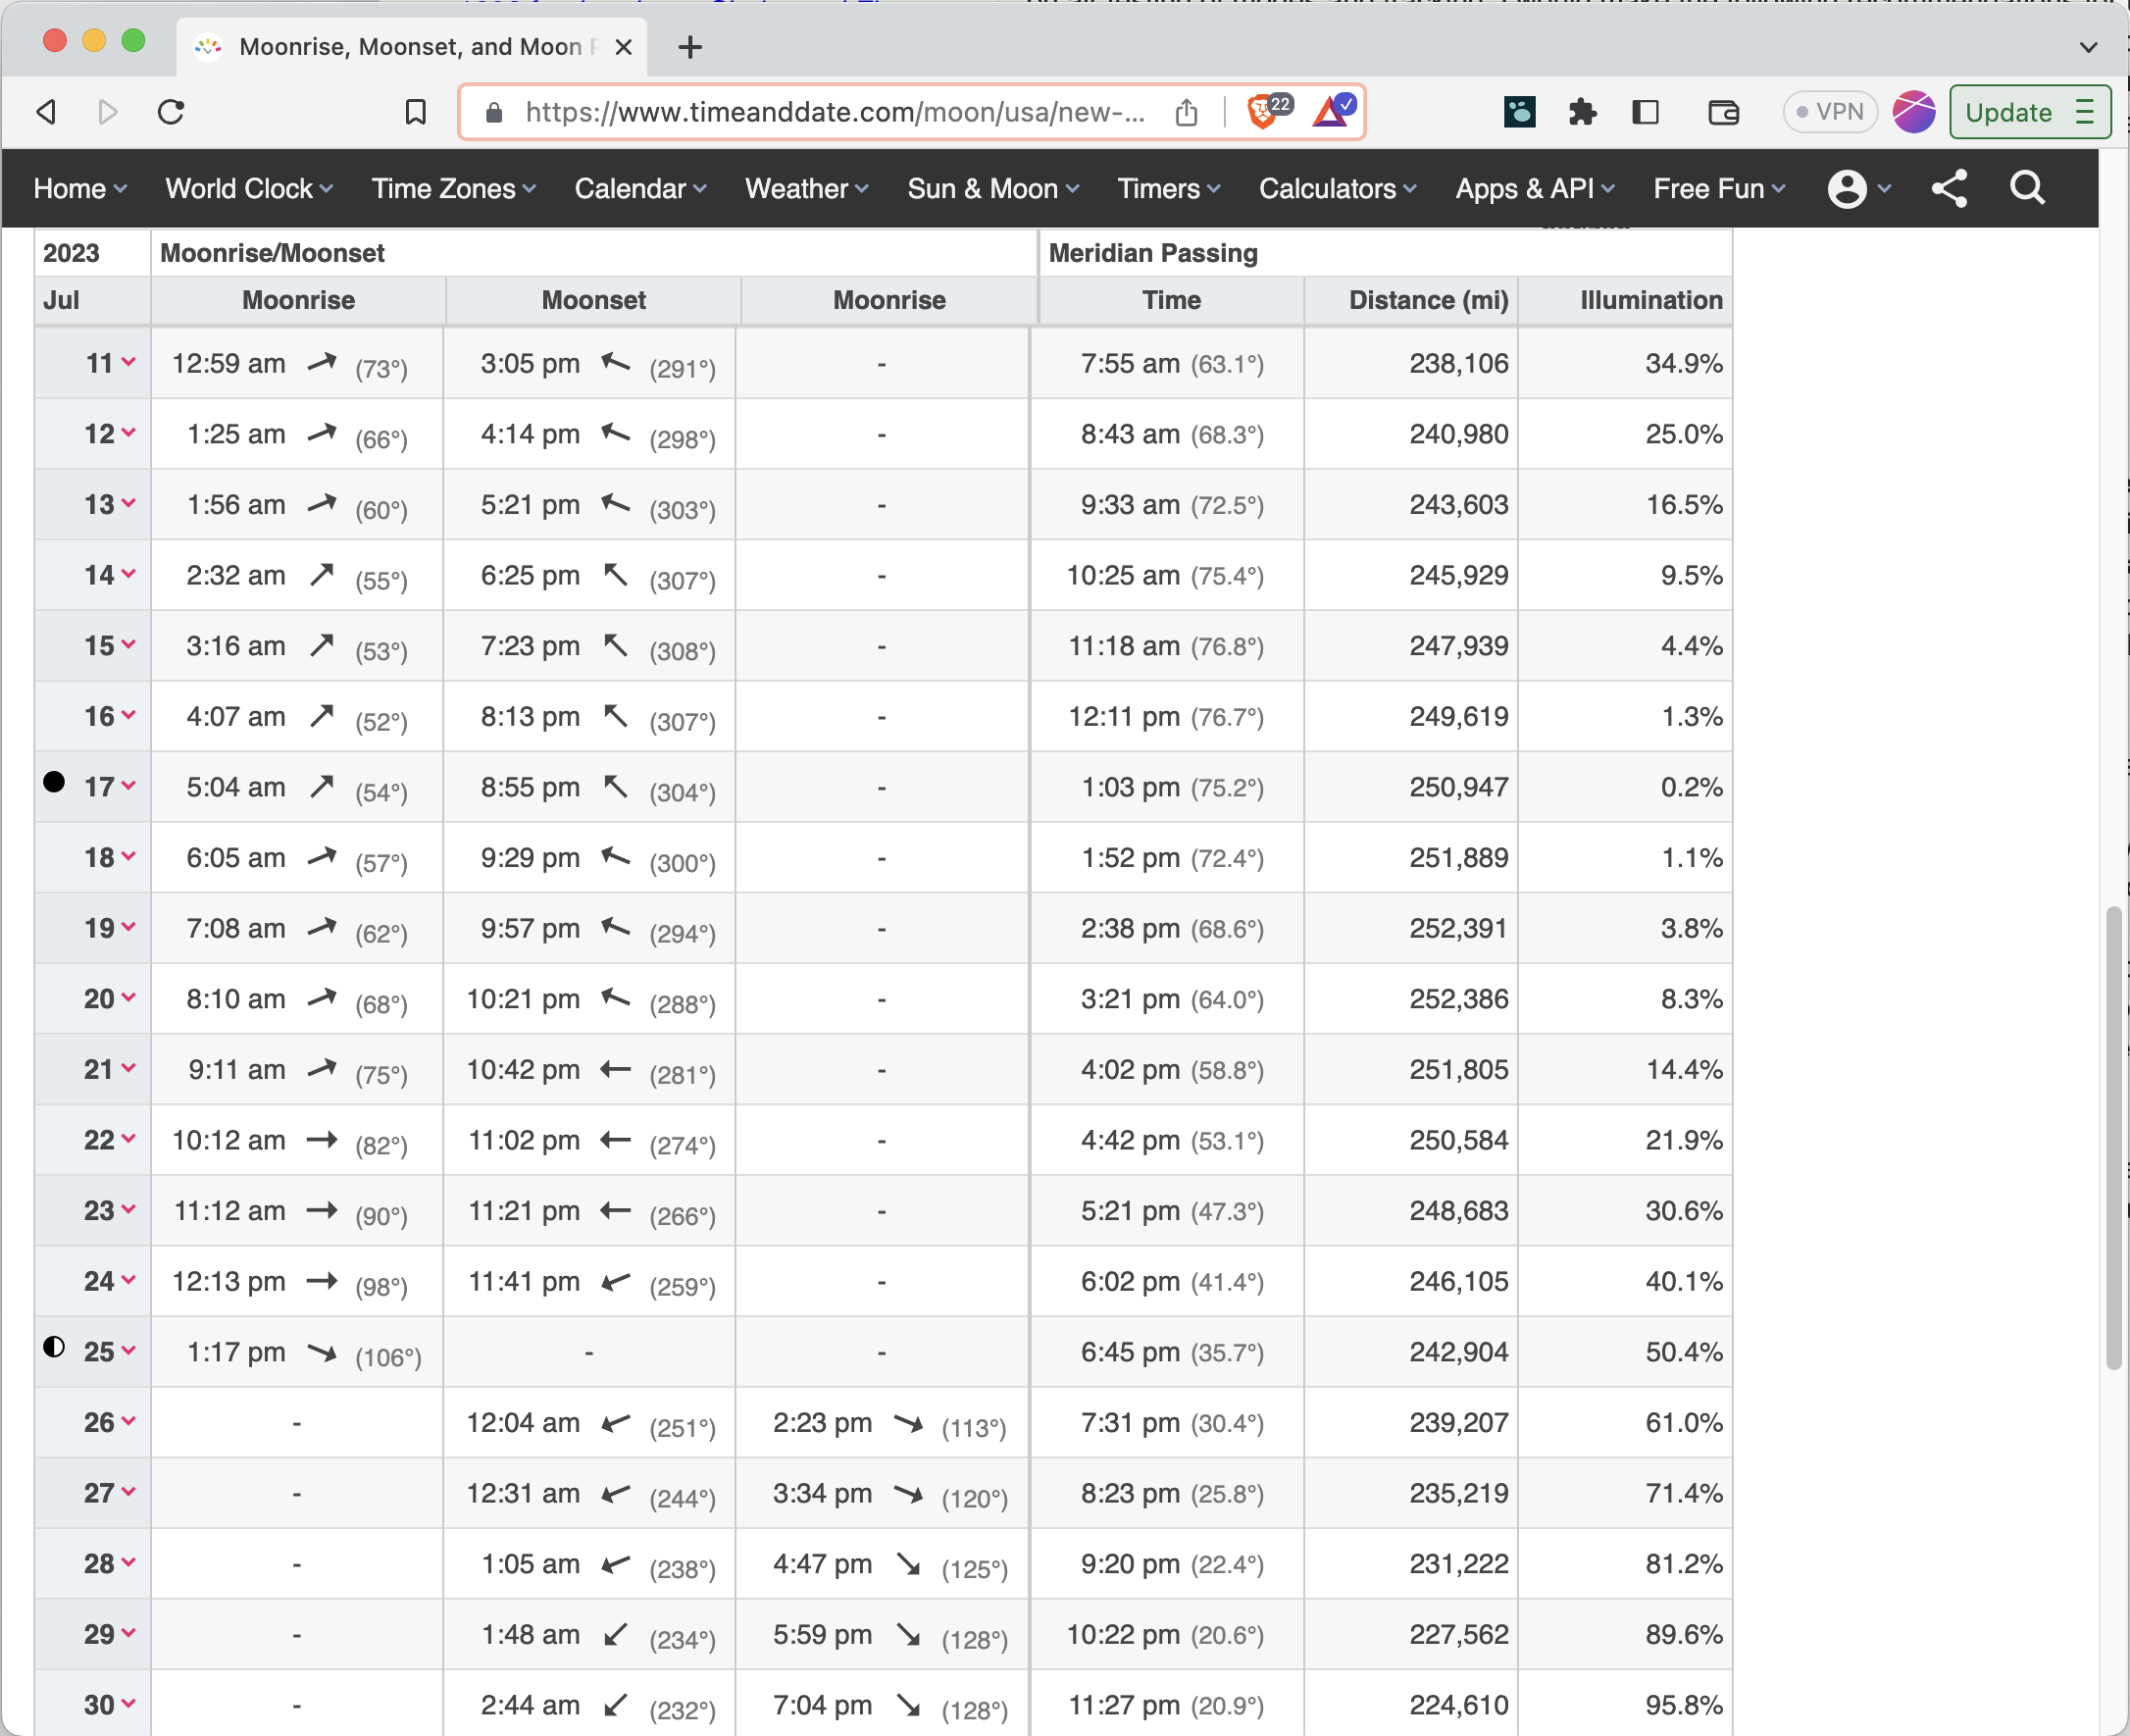
Both website are useful to determine the Moon direction and elevation as well as its distance from the Earth. Distance plays a big role in this: having the Moon at “just” 360000 Kilometers is much better than having it at 405000 Kilometers, for obvious reasons. More simply, you might end up using those sites (or similar others) to predict when the Moon availability is compatible with schedule.
Please note that WSJT-X can display some of the same info within its “Astronomical Data” window however I still like to use these websites as I find them more accessible and useful.
Mooncalc.org is useful to display realtime Moon parameters.Timeanddate.org’s Table function can be used to predict Moonrise/Moonset times as well as Moon Distance.
Pinging the Moon
Before you go into action – especially if it is your very first attempt – you might want verify if you can receive your own echos bouncing off the Moon.
In a nutshell: with your station ready to go on a clear frequency, select the “Echo” mode and click on “Enable TX”. Pinging will begin immediately. VHF does not require Doppler correction at the Rig level so you cal leave Doppler Tracking on the Astronomical Data Window unchecked.
Here is a successful example:
As per the documentation, the reply quality is represented in the Q column on a scale from 0 (no echo) to 10 (perfect echo).
Echos won’t always come back from the moon. That might indicate a problem with your setup (is power being actually transmitted? is the antenna pointed towards the moon? is the RX chain working properly? the list could be long…) or it could also indicate – as they say – poor “Moon conditions“.
Original Picture By Gregory H. Revera, CC BY-SA 3.0
Introduction
Ever since I embarked on my journey in Amateur Radio, I have always regarded EME as the pinnacle of the hobby. The concept of bouncing signals off the Moon held a tremendous allure, but the immense distance, substantial link budget, and the requirement for massive antennas made it seem completely unattainable.
However, over the years, moonbounce has become increasingly accessible. The proliferation of digital modes has enabled ordinary hams to achieve Earth-Moon-Earth contacts even with relatively modest setups. You no longer need an antenna that would grace the front cover of a magazine to engage with the moon.
More recently Remote Ham Radio mada available a quite decent EME station for anyone to utilize. Consequently, if you wish to try EME today, all you need is your laptop. Pretty neat, isn’t it?
Before we move on, let me clarify two things:
This is intended for Mac users. If you use Windows… I’m sorry!
Remote Ham Radio isn’t sponsoring me in any way. I actually paid with my own money in order to use their service and research its functionalities. But… hey I did for science so that’s OK. I also did for fun. Actually, I did it just for fun. Whatever… let’s get into it!
Cost
Remote Ham Radio is a company that offers some kind of an “Amateur Radio as a Service” model. The concept is simple: they build powerful stations and you paid to use them. One of their stations – called Jefferson – is EME VHF capable.
Jefferson has an array of 4×16 elements Yagis and a 1KW amplifier. This is far from being a Big Gun in the world of EME, but is definitely enough to make a lot of contacts. Using the station currently costs $0.79 per minute + membership fee ($99 per year or $20 per month) . As you can see this isn’t cheap but it is still certainly cheaper than building your own station from nothing.
What you will need
Unfortunately RHR’s documentation about EME isn’t super descriptive. In the process of learning how to use their station I ended up with a setup that is a bit different. I find mine to be more convenient for the simple reason that it doesn’t require you to alter your Mac’s default security settings. Also, you will not need to pay extra $99 in order to purchase a third party program (see below).
This is what you are going to need:
A Macbook or any other OSX based computer
A RHR account (requires a valid US Ham Radio license)
During the past year I practically ended all ham radio related activities due to some family updates 👶 🙂
In the summer however I visited Italy again and… guess what? I had an opportunity to make another Japanese contact on 20 meters SSB, this time with JH1GEX Yutaka, near Tokyo.
Yutaka is an excellent operator: he routinely halts his pile-up to allow mobile / portable stations to make it through. If everyone would be so kind, portable operations would be much, much easier! Thank you Yutaka san!