Setting up your Laptop
STEP 1: Install xCAT and the RHR app
Download and install both xCAT and RHR. You are not going to add any configurations until it will be time to use them.
STEP 2: Install the Blackhole Audio driver
An audio driver application is needed in order to route audio feeds between different applications. Blackhole is an open source driver that is very easy to install or remove.
To install, you can either download the installer or – if you already have it – you can use Homebrew with this command:
brew install blackhole-2chNote: The authors would love if you could donate $10 to their project, but that isn’t strictly necessary.
The 2 Channels version is just perfect for this application so there is no need to use their 16 or 64 channels versions.
Either way, at this point a new Audio Device one called “Blackhole 2ch” will appear:

STEP 3: Create a Multi-Audio Device
A Multi-Audio Device is useful in order to listen in as you either receive or transmit. To create it, open “Audio MIDI Setup” (it’s inside the “Utilities” folder) then create the device by clicking on +:

Within the newly created device activate both the Speakers and the Blackhole devices:

Now yet another audio device – called “Multi-Audio Device” will appear in the list:

Note: The Multi-Audio device could be omitted if you decide that you don’t want to monitor any audio. If that is OK with you, just replace the below mentions of it with “Blackhole 2ch”.
STEP 4: Install WSJT-X
If you don’t already use WSJT-X for Mac you will need to install it. Just download it and follow their instructions.
There is however one trick I’d like to share: if you want to avoid modifying your system configuration you can run the following command in a terminal window right before you use the program:
sudo sysctl -w kern.sysv.shmmax=104857600; sudo sysctl -w kern.sysv.shmall=25600That will allow you to run it until you eventually reboot. No changes necessary!
STEP 5: Create an EME specific WSJT-X configuration
The WSJT-X settings needed for EME work are different from the usual ones and probably deserve their own configuration. Here is mine:


STEP 6: Setup RHR
When you launch RHR for the first time the application will ask for your Remote Ham Radio account username and password. After that, you will be presented with a screen where you can select the station you want to use. Go ahead and select W2/Jefferson from the list (Relax: you are not paying anything yet).
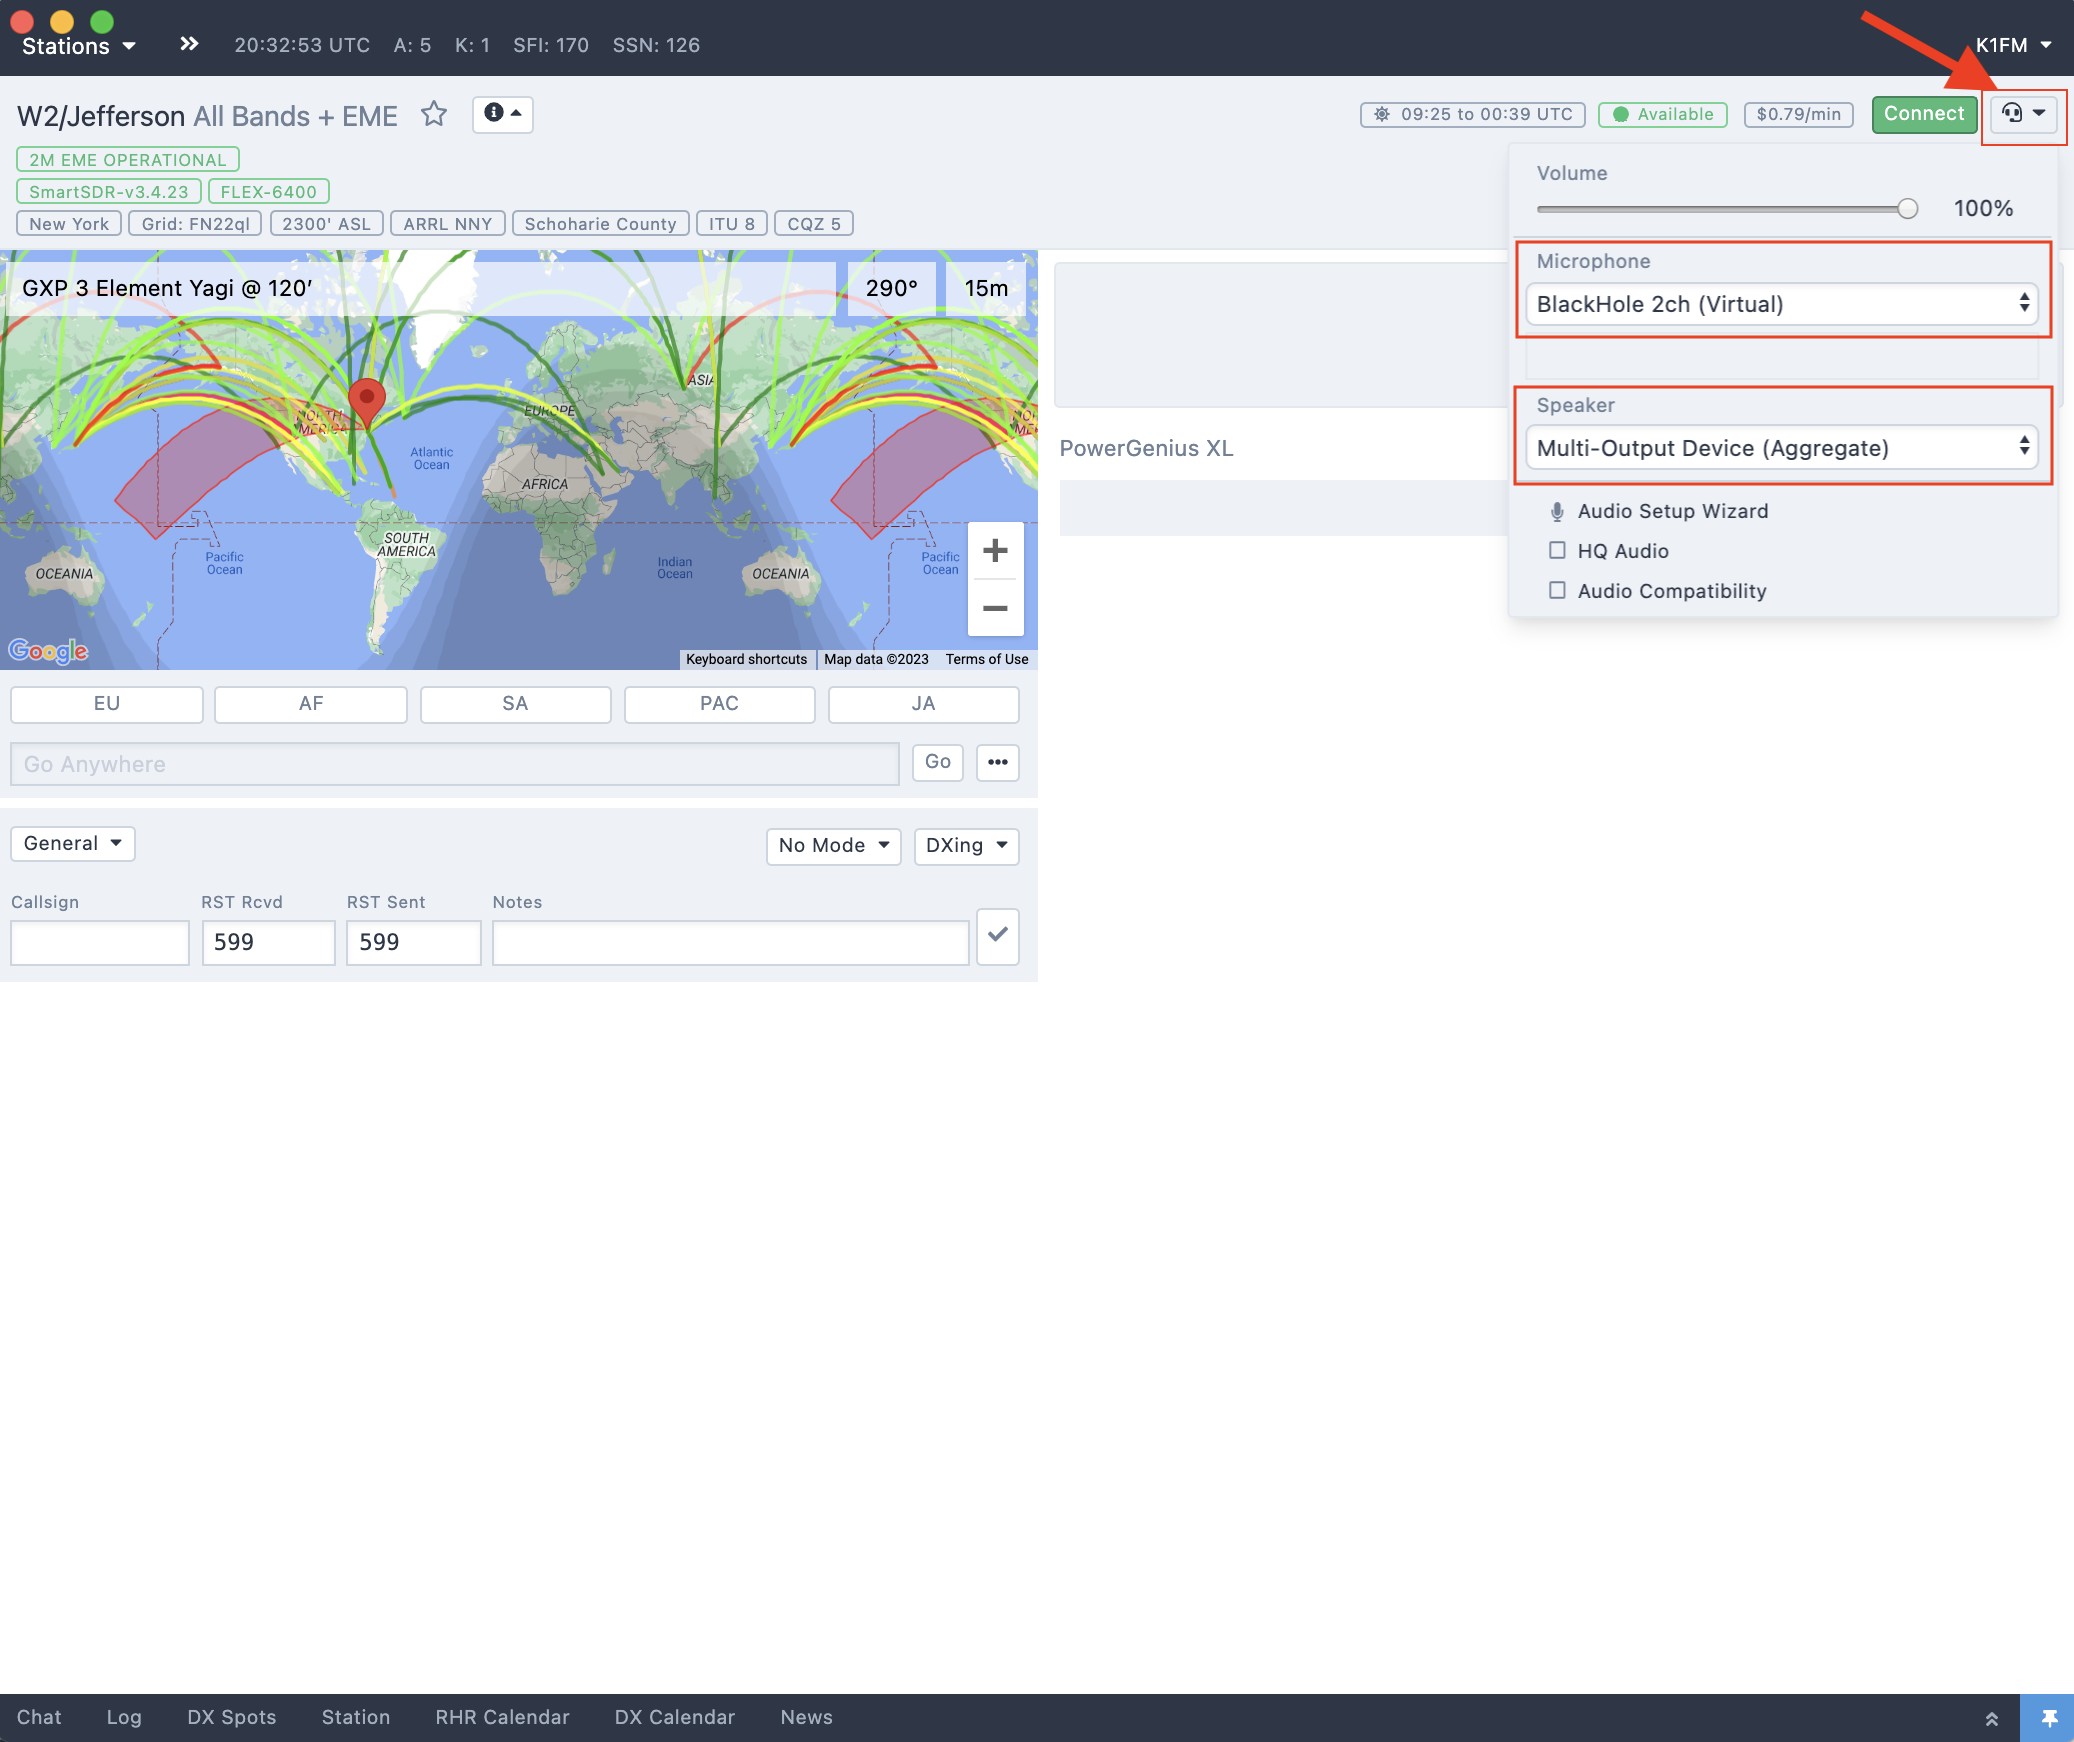
On the upper right corner of the window, click on the headphones icon and select the audio devices we just created: Blackhole for the Mic and Multi-Output Device for the Speakers. This is what you need to see:
Now click “Connect”. Beware that from this point on the clock starts running and will be charged by RHR according to how long you will use the station.
Please note the following:
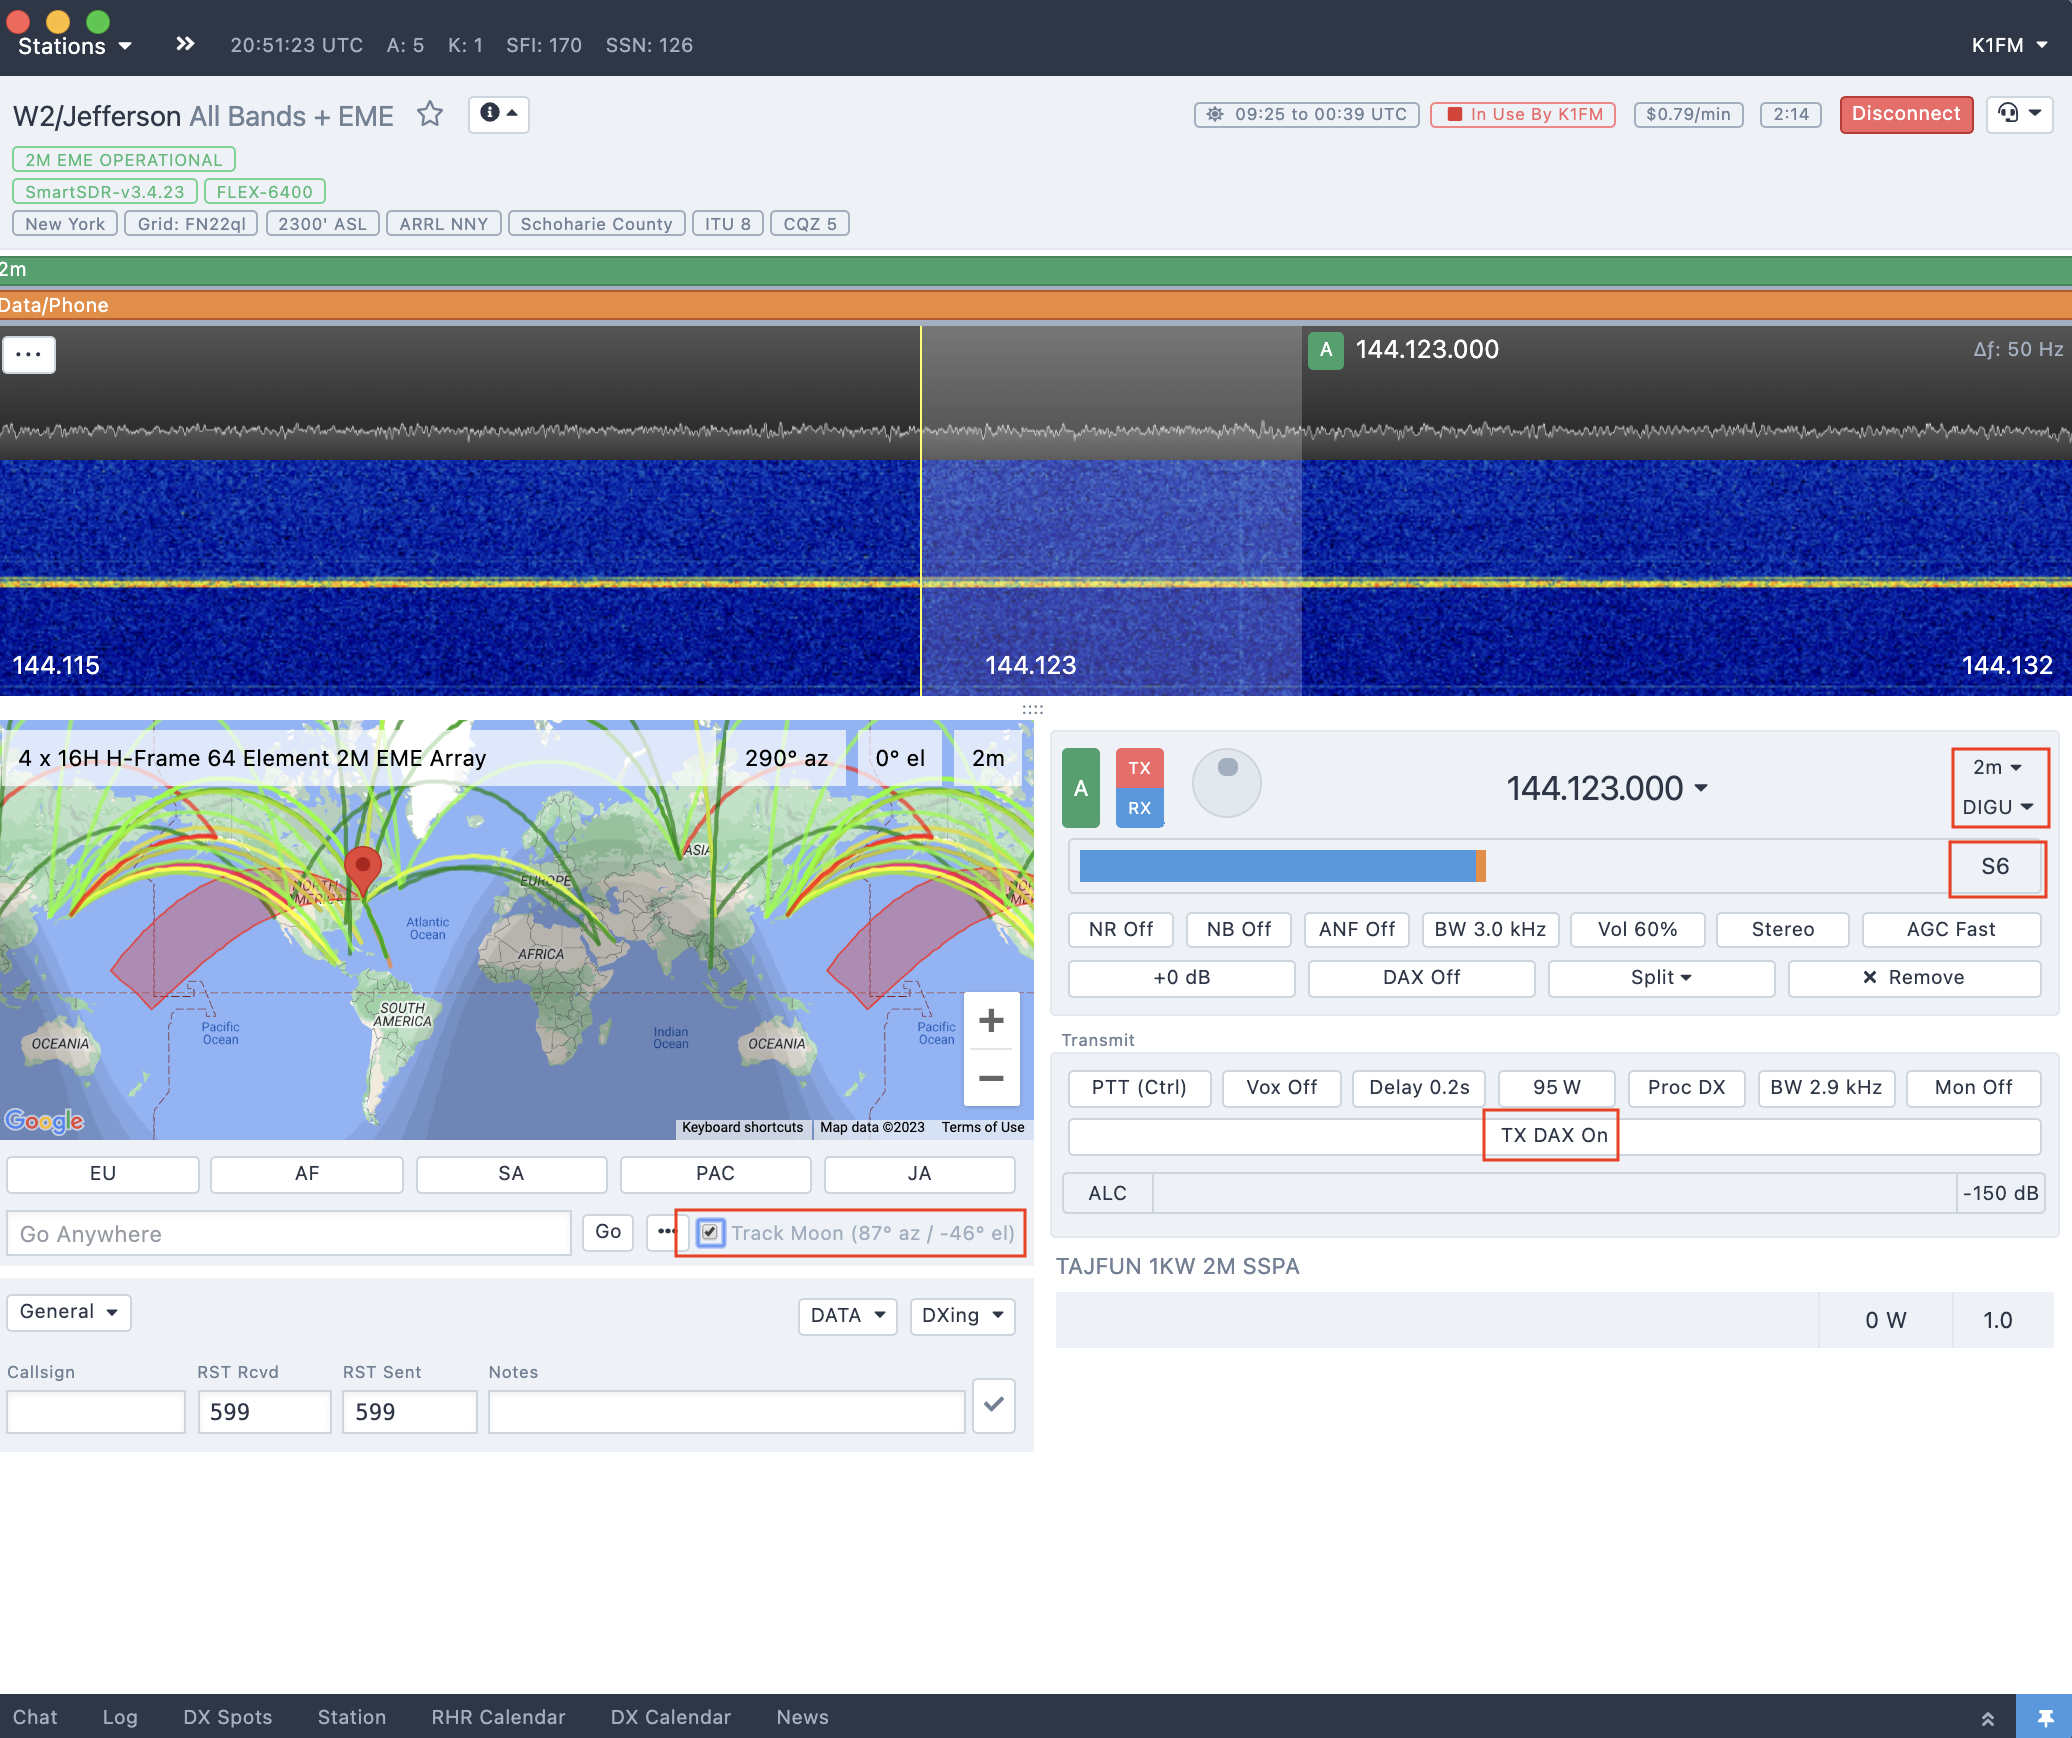
- if when you connect FT8 is the selected mode then you must manually change it to DIGU (or USB, doesn’t matter as long as it is not FT8). You will not be able to use WSJT-X otherwise.
- Make sure “TX DAX” is set to ON
- In VHF it is perfectly normal to see a noise-floor around S5 or S6
- Do not forget to activate “Track Moon“
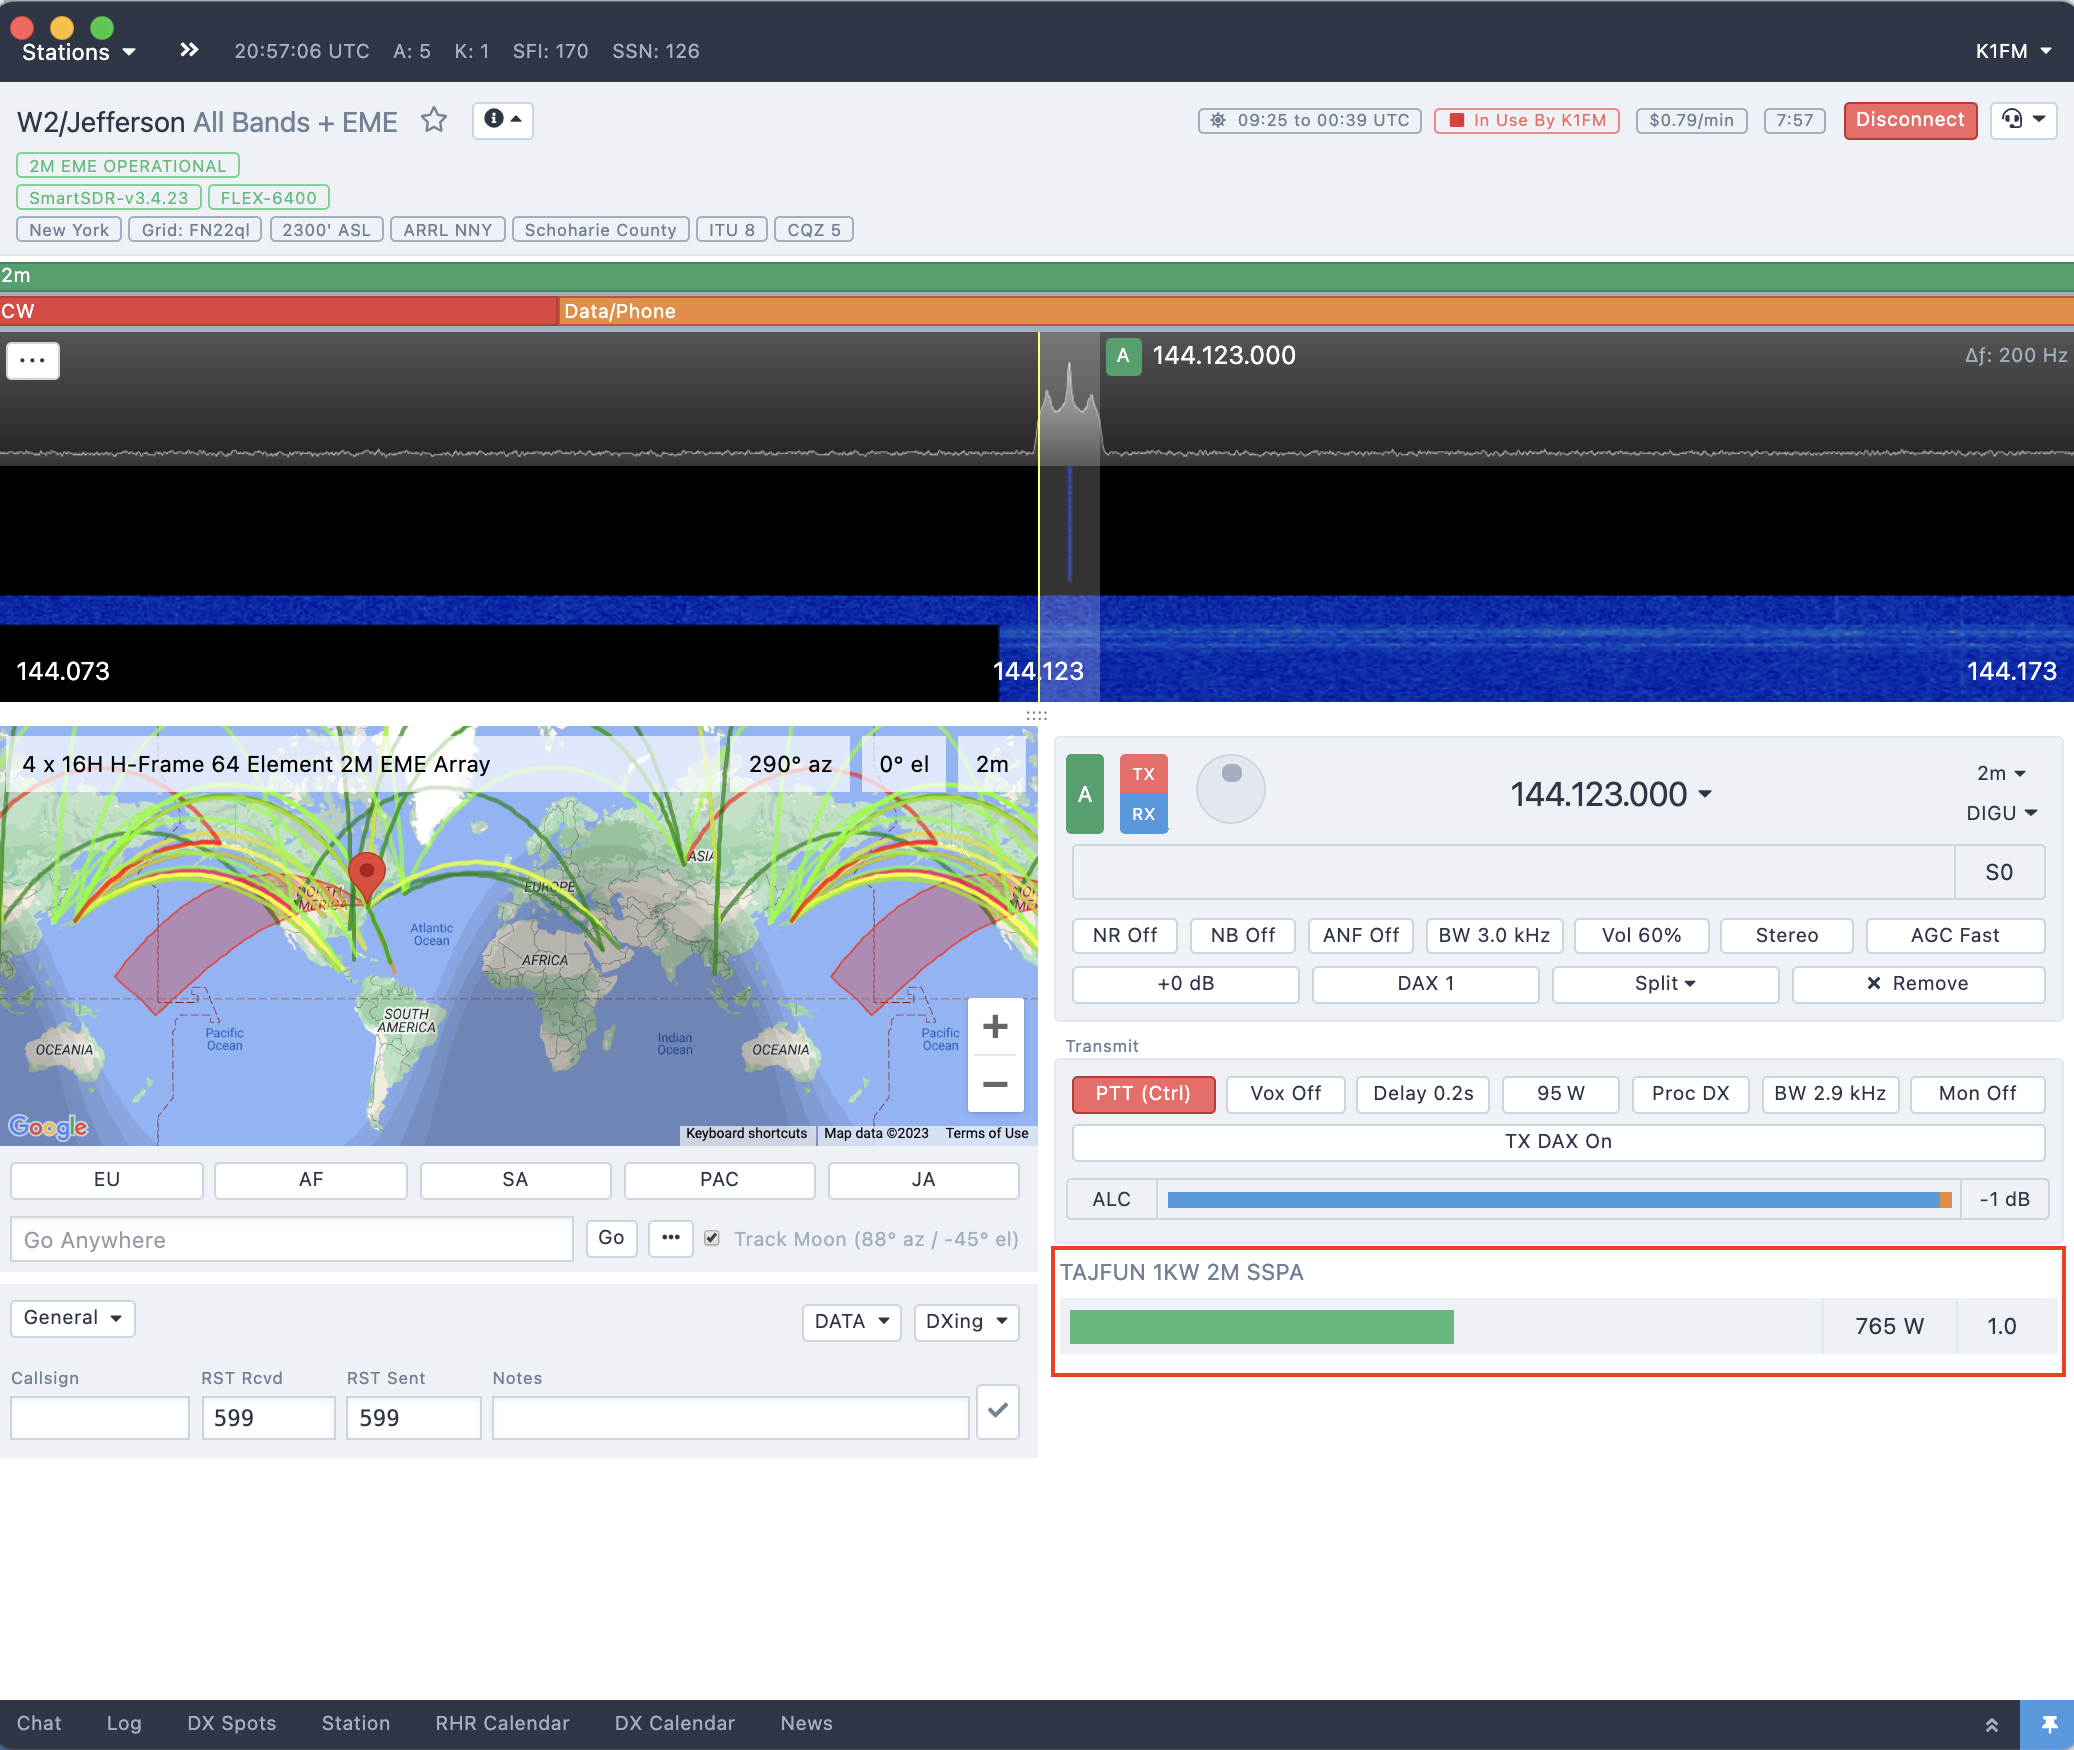
This is what the station should look like in the app:
STEP 7: Launch and connect xCAT
Now launch xCAT.
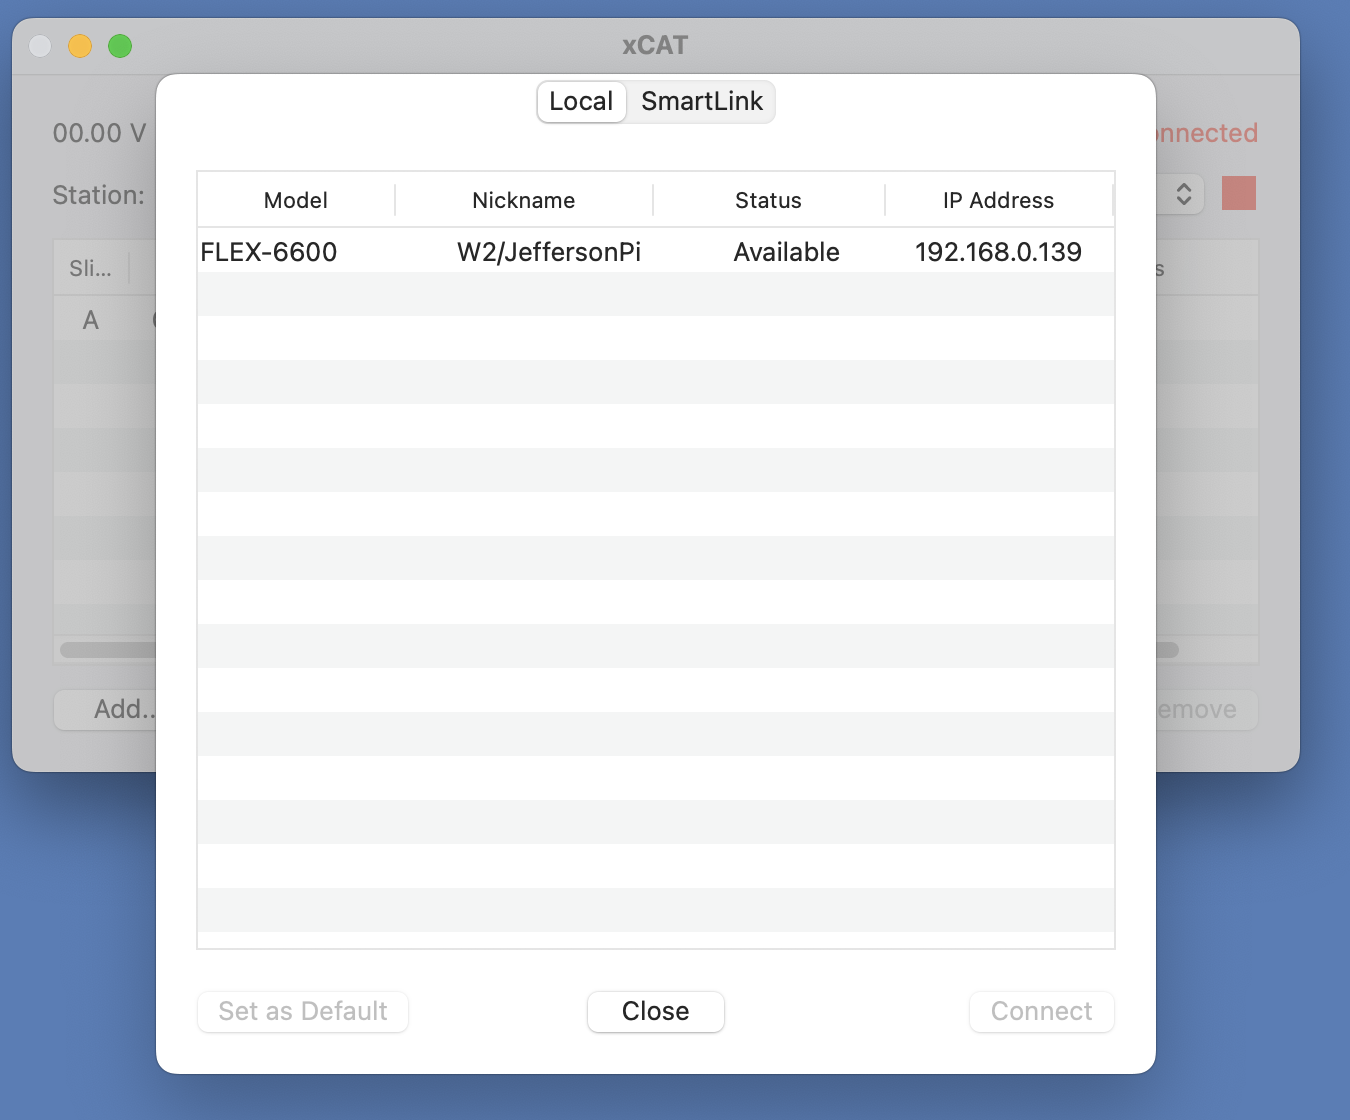
You will be presented with a Window where you will need to double click on the station you want to connect to. There will only be one entry in the list so you can’t miss it: just click W2/Jefferson:
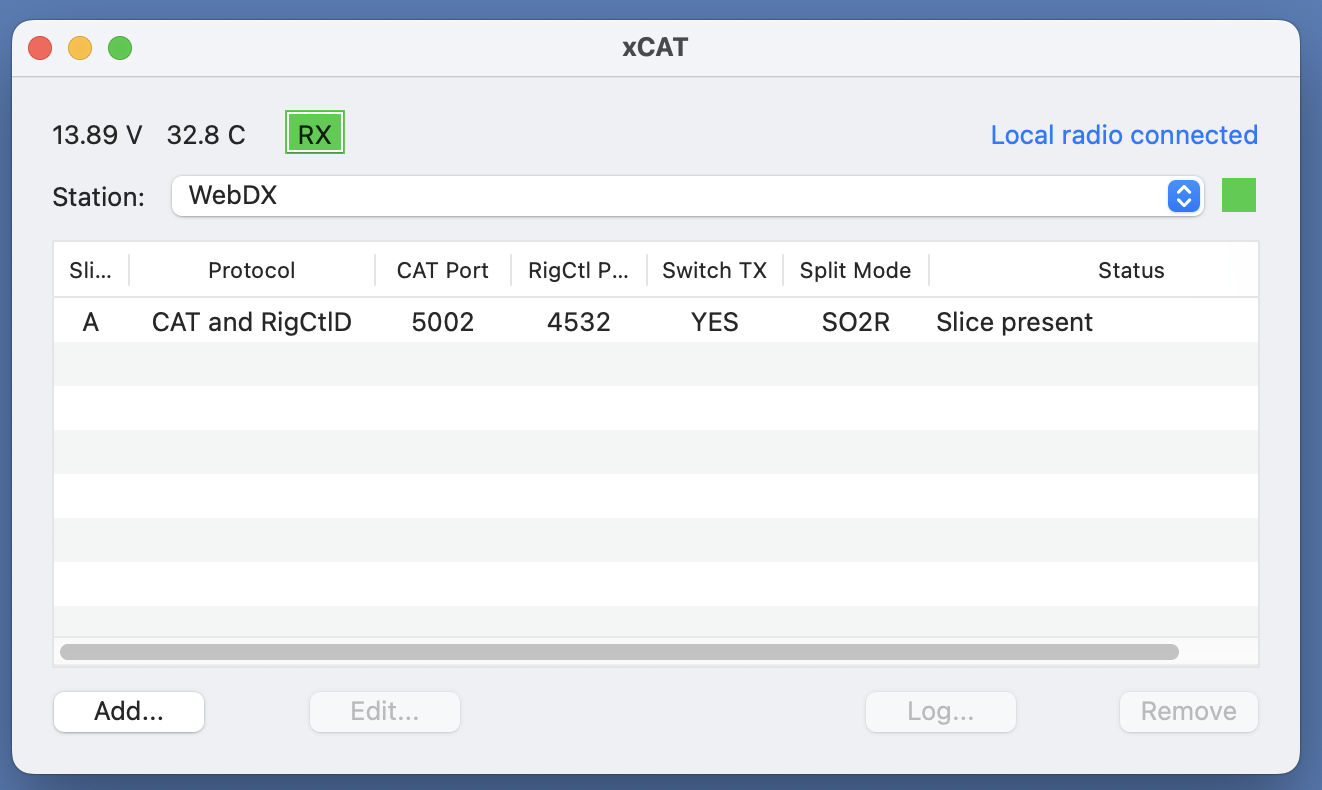
After you select the station xCA is already active and ready to be used. You are free to minimize or hide it as you won’t need to look at it anymore:
Note: using xCAT could theoretically be avoided if one were to renounce Radio control and use VOX as PTT method.
STEP 8: Verify WSJT-X can transmit
Open WSJT-X and make sure you select the same configuration created in Step 5. Select “Tune” and check if the amplifier is transmitting around 750W:
That’s it! You are ready to rock and roll.
What’s next?
Doing the actual EME contact is complex enough to require a dedicated post. In Part 2 I will try describe the operational aspects of it so you can avoid the mistakes I already made.