During the past year I practically ended all ham radio related activities due to some family updates 👶 🙂
In the summer however I visited Italy again and… guess what? I had an opportunity to make another Japanese contact on 20 meters SSB, this time with JH1GEX Yutaka, near Tokyo.
Yutaka is an excellent operator: he routinely halts his pile-up to allow mobile / portable stations to make it through. If everyone would be so kind, portable operations would be much, much easier! Thank you Yutaka san!
With the help of Antonio IK6ZRX (who cut through the pile-up) I was able to work Kazu, JH3NGD with my portable loop and 10W on 20meters SSB.
Here is the video:
Unfortunately It was night and I could not properly ready Kazu’s call, so I misread it the whole time (rookie mistake). Besides that, I was given a 53 and was able to have a nice little QSO with Kazu, who speaks perfect Italian!
This obviously was a much easier QSO than It could have been because I had been announced by Antonio. Nevertheless it was for me a remarkable one. Thanks Kazu and thanks Antonio!
The latest version of the K1FM-Loop is electrically similar to the previous one, but it is designed around off-the-shelf parts or, more generically, items you can readily order online.
This antenna relies – heavily – on 3D printing. Acquiring the non-printed parts and assembling them should be fast and easy as no reworking at all is necessary. The needed tools are screwdrivers, wrench keys and a soldering iron. You also need a 3D printer, of course, or at least access to one.
Socket Head Cap Screw, M5-0.8mm Thread, 12mm Long, Alloy Steel, Black Oxide (8 pieces)
Button Head Socket Cap Screws, 6-32 x 5/16″, Black Oxide Alloy Steel (3 pieces)
Hex Socket Head Cap Screws Bolts, M3-0.5mm, 9mm Long, Alloy Steel , Black Oxide (8 pieces)
Hex Self Clinching Nuts, M3-0.5mm (8 pieces)
18AWG electric cable ~5 inch
M3 Ring Cable Lugs Terminals (4 pieces)
The antenna is composed of three parts that I am going to describe separately. They are:
Capacitor assembly
Radiator / Exciter assembly
Supporting structure
Let’s see them one by one:
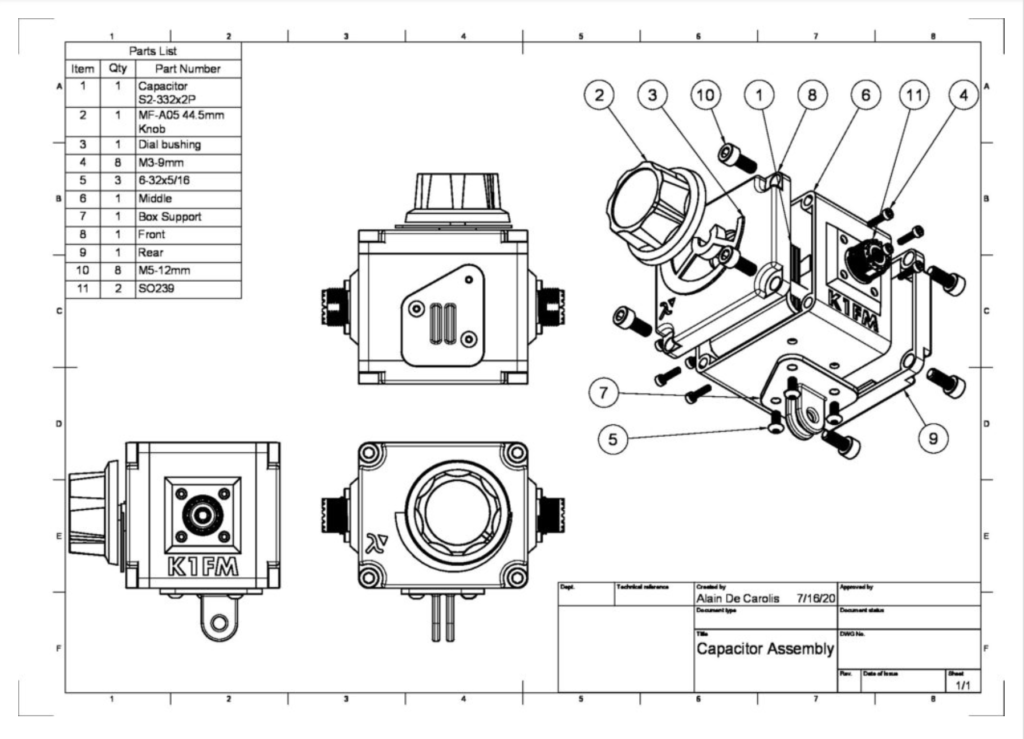
Capacitor assembly
First of all, you need to print the necessary 3D printed parts. It might be opportune to print the Dial Bushing in a different color, in order to make more visible against the rest of the box. I printed the box in PETG because of the enhanced mechanical and thermal characteristics. ABS would also be opportune I think, or even PLA (provided you are careful not to leave it inside of a burning car).
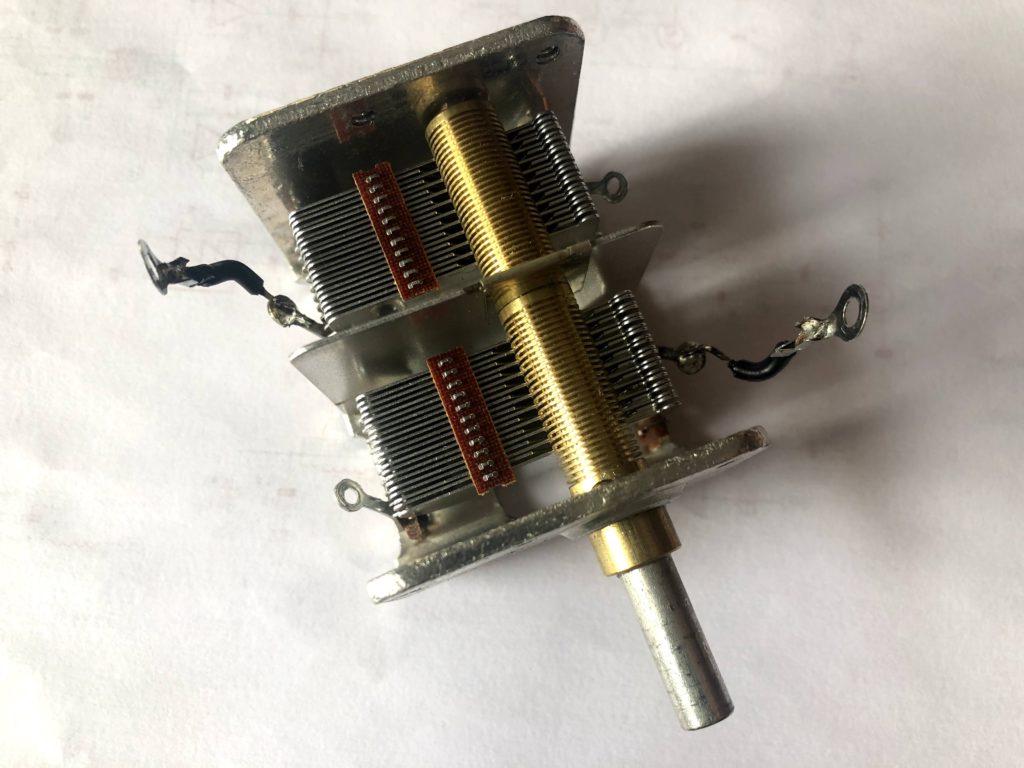
As the print goes, you can start working on the other parts. All you need to do is solder a piece of cable on each gang terminal, on opposite sides. Terminate the cable extensions with a ring contact, like so:
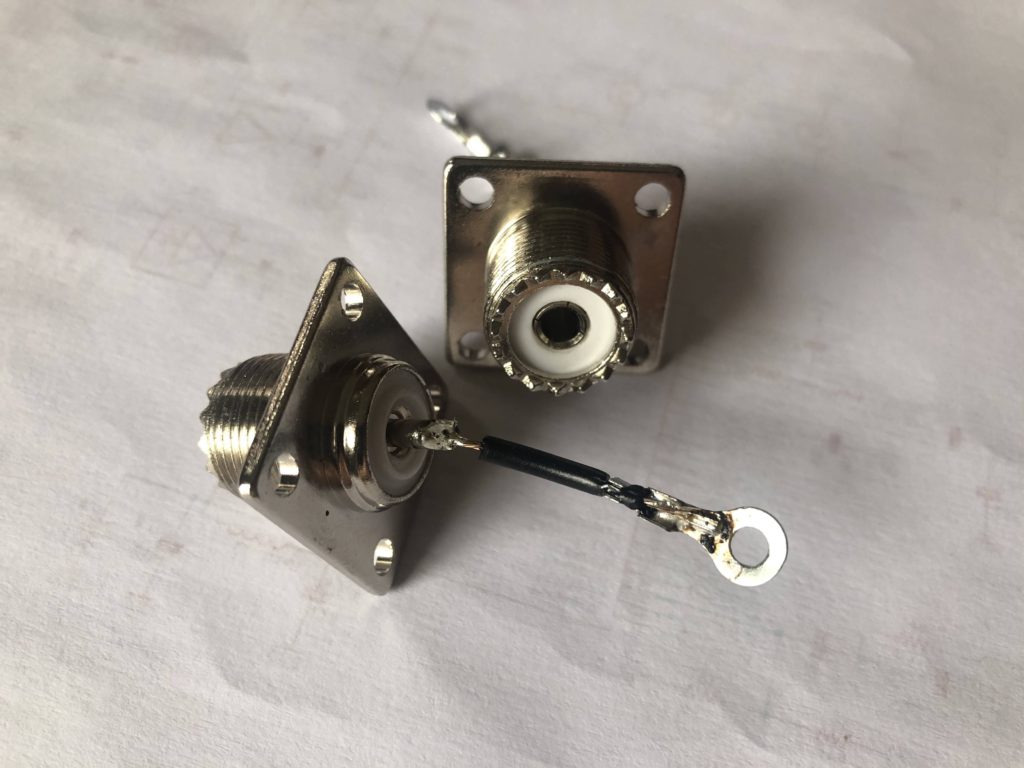
Optionally, you could solder the same extension on the center connector of each SO239. This will allows to use the center conductor as part of the radiator (Do I think this is useful? I don’t, but I’m going to do it to avoid the complaints). Here are the connectors, ready to be used:
I still have my Italian callsign active. During my short holiday in Central Italy, I took the opportunity to use it again. Here I am at the beach doing some QRP contacts (in the video, R9MM):
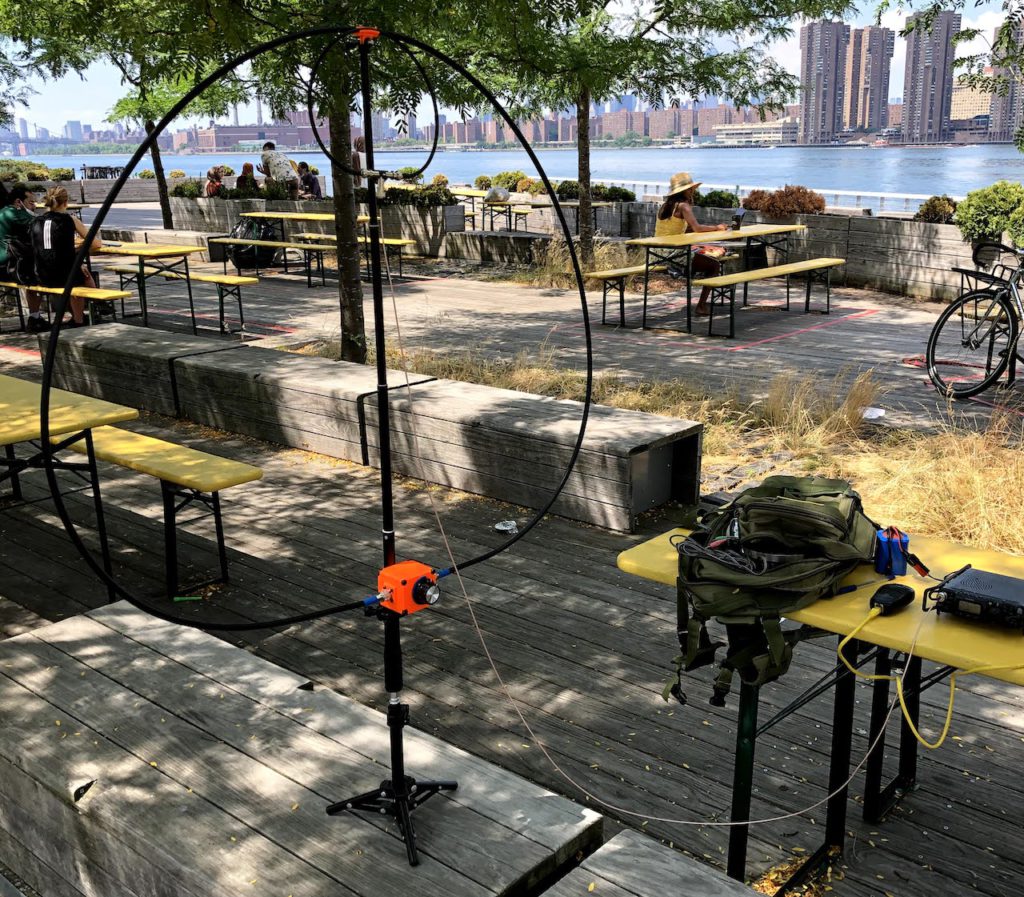
I really like going QRP from a not so popular location on East River, right between Manhattan and Queens. I normally don’t plan for it. I just go whenever I feel like it and, obviously, I have time to do that.
Yesterday was one of such occasions. It was a particularly interesting day because the WPX CW Contest was going to start at 8PM local time and I had come home relatively early from work.
I wasn’t planning to try to contact CW stations at the very beginning of the contest (too late for me to stay at the river, bands too crowded). Instead, the idea was trying to catch those operators warming up their amplifiers (and their fingers!) in the hours immediately preceding the start of the competition.
Sure enough, those stations were exactly there, as I expected them to be. In one hour I made 9 contacts, all Europeans (plus Russia). Another fun day at the river! Here is the video: