During my 2019 xmas holiday I took the occasion to launch again in Italy. Unfortunately I made the mistake of loading too much gas and, as a result, one of the two lift balloons popped shortly after take off.
The silver lining of this short-lived launch is that I think I found my definitive construction style. The think food foam sheet I used is useful to provide some mechanical resistance to the solar cells and also to keep the transmitting electronics a bit warmer.
I have a feeling that next launch is going to be much, much longer!
After months of research and preparations, it finally happened: last Sunday September 22nd, together with my wife and with Joe N2DI we launched my first pico balloon.
The unit currently transmitting uses Joe’s callsign N2DI. We actually launched another one with mine own callsign but unfortunately its antenna got twisted and, because of that, it could only be heard at a very short distance. Here are some pictures, and here are all the position reports we received so far:
The balloon last flew over Miami where it sent a CW message that was recorded using a remote SDR receiver.
The Balloon payload is finally finished, and practically ready to fly (I need to solder a capacitor at the bottom, but that’s a one minute job).
For the software I ended up forking and modifying OrionWspr, which I renamed GeminiWspr. As it is now, the beacon will transmit on every available WSPR slot after doing GPS calibration on startup and recalibrating every 20 minutes. On minutes 00 and 30 the beacon will also transmit a CW telemetry message on 14.099 MHz.
Power is supplied by 7 solar cells, providing about 3.6 volt. A 1F supercapacitor, fed by a low voltage dropout diode, is applied to guarantee a minimum of power continuity. Current is plentiful, to the point I could have actually split those cells in half. That is somethings others have managed doing but when I tried I shattered the cells each time. I’ll need to ask around for next time.
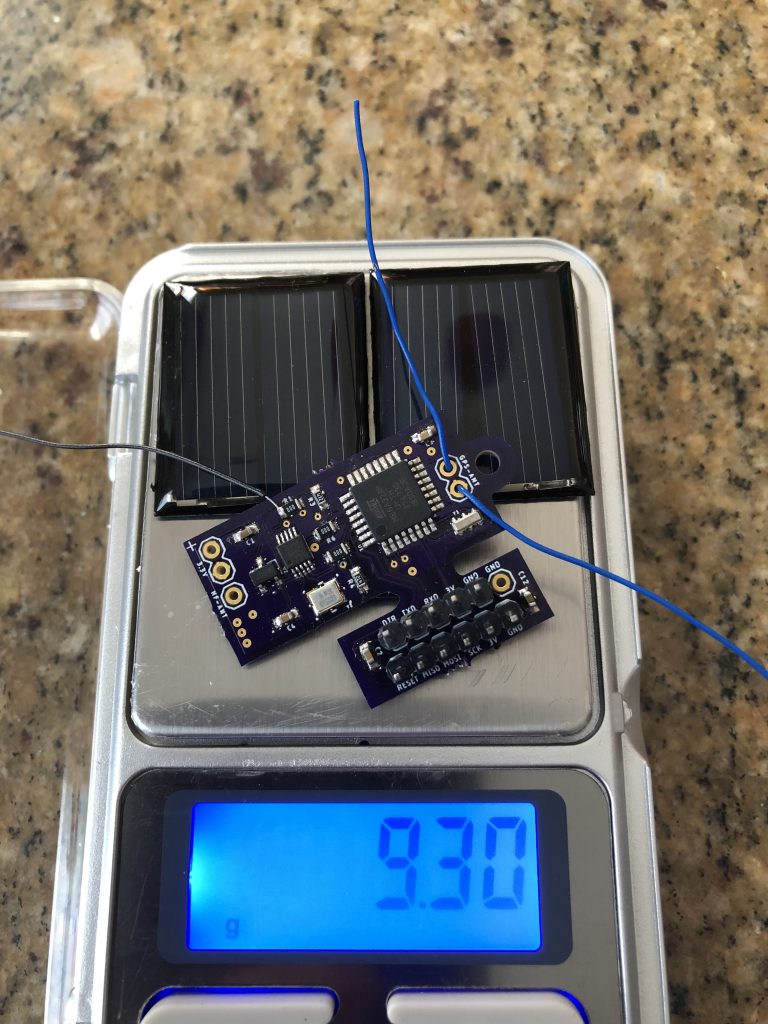
Here is the finished payload:
I must admit that it seems a bit heavier than I have originally planned for, especially after considering that the actual board (after removing the disposable header) weights just 2.81 grams.
Finding lift gas has been a challenge. The logistics of gas procurement, storage and transportation to the launch site aren’t trivial when you live in a big city apartment and you do not have a car. Long story short: I had to forget about Hydrogen and reverted to Helium.
The latest release (version 1.3) is 4 layers and weights around 3 grams when printed on a 1.6mm PCB (can further be reduced in the future). It also have some interesting new features: allows self-calibration, can measure its own power supply and has an onboard temperature sensor. Here it is:
On the software side, I might use OrionWspr by Michael Babineau which now supports my board. As an alternative, a simpler version I am developing could also be deployed.
The part I am still wondering about is power. Contrary to my initial understanding, it is, after all, possible to avoid using batteries (or super-capacitors) and power the balloon by solar panels only. That would require somewhat larger panels (probably around 6 or 7 grams) that could generate enough current for the board to run under direct sunlight. An alternative option is to use lighter panel s (1.5 grams or even less) that feed a power charger which in turn charges a 1.5 Farad (5 grams) super-capacitor. Finally, there is the possibility of using lighter panels which directly drive a capacitor without using any chargers. This raw method seems to be preferred by other balloonists but I still don’t have a solution for it.
The Pico Balloon concept is simple: you build a transmitter small enough to be carried around by one or two common party balloons. As the transmitter floats around the globe it transmits its current position and altitude so you can follow its path in realtime. If you do it right, the balloon will circumnavigate the globe… repeatedly. Great stuff! I had to do it.
After realizing that it was relatively easy to construct a WSPR beacon based on Arduino and a clock generator, a few months back I decided to try building one.
The first attempt was on a breadboard with an Arduino Pro Mini, a uBlox breakout board and the Etherkit s5351a breakout board. After writing a few hacky lines of code (WSPR libraries are already available) WSPR worked! All I needed was making everything small enough to be carried by a party balloon.
I decided I was not going to use the standard Arduino Pro Mini. Rather, I was going to load the Arduino boot loader on a ATM328P myself and have everything else (GPS + Clock Generator) on a the same board. This unit also worked and, technically, was already small enough to be carried around by a couple of large balloons.
But how was I going to power it? Was a small LiPo battery suitable? After checking the specs I realized that even the smallest ones were too heavy. On top of that, batteries don’t take extremely low temperatures well so it definitely had to be solar power.
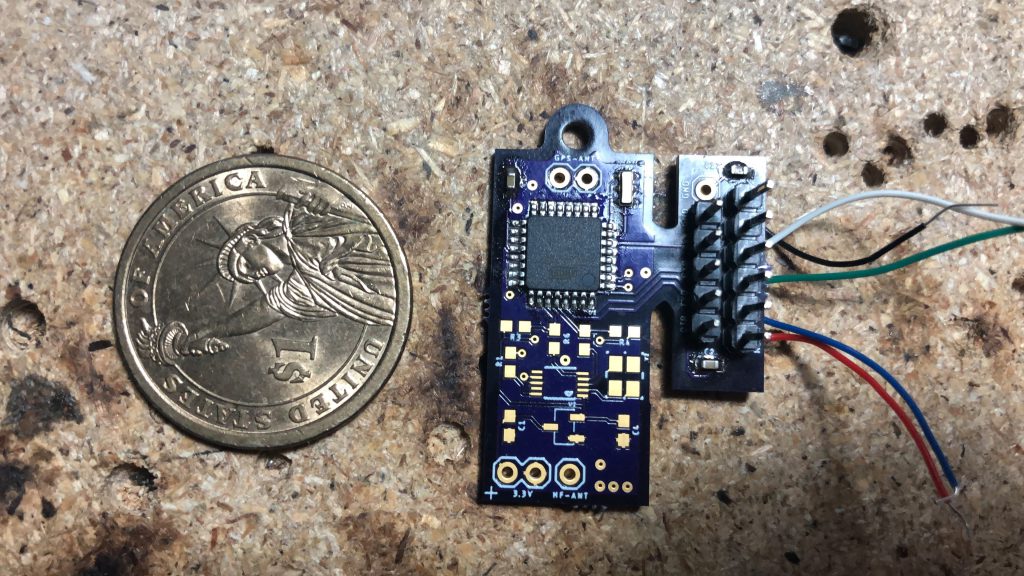
In the next revision, which I called 1.1, is where I faced the first serious obstacle. Until that point I was able to successfully load the Arduino boot loader without too much trouble using an ancient Arduino Uno as the ISP programmer. For reasons I still can’t understand, that wasn’t the case anymore with revision 1.1. Fortunately, when I was close to giving up, I remembered that back in the days I had purchased a proper ISP board and tried with that: Bingo! Problem solved. As you can see, on version 1.1 all necessary programming connections have been moved to a section of the PCB which is supposed to be cut out before launch (the wires soldered on the side were part of my desperate attempts to troubleshoot the ISP malfunction…).
At this point I had a transmitter that – together with the solar panels – weighted less than 10 grams! I really believed it was just about time to buy the balloons when I faced the second problem: I had grossly overestimated how much power solar cells can deliver. Yes, tensions can be pretty high but currents… well, currents are tiny: there is absolutely no way the beacon can be carried around by small balloons while being directly powered from solar panels as I originally envisioned. I needed something light that charged a capacitor and then – only then – I could start transmitting.
By searching things like “Tiny Solar Power Charger” I ended up on Jared’s (N7SMI) page. I was stunned: his pico balloon concept and hardware was identical to mine except that he completed it years in advance and, unlike mine, his actually worked and flew already many times. Jared had already solved the power issue with a 1.5F super capacitor charged by an SPV1040 controller and two 0.5V solar cells. Brilliant! Not only that. In order to save power, he provisioned his transmitter to selectively switch off the GPS and/or the clock generator. He also has a temperature sensor and – surprise surprise – a CW beacon too! Clearly, I now have enough material for version 1.2.
On part two I will publish my current schematics, PCBs and source code.